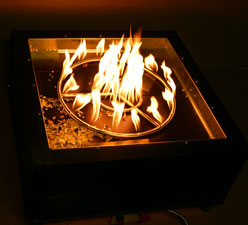
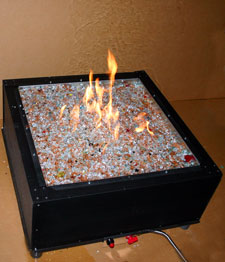
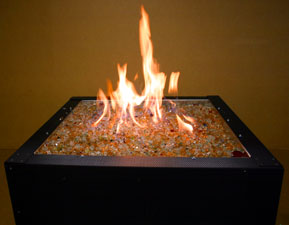
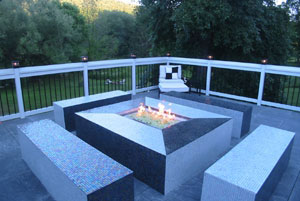
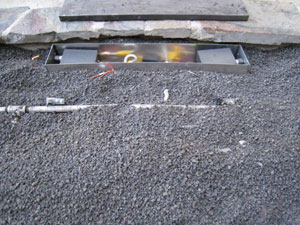
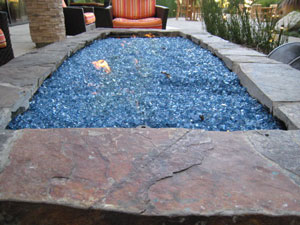
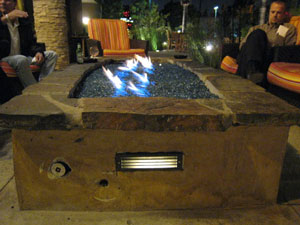
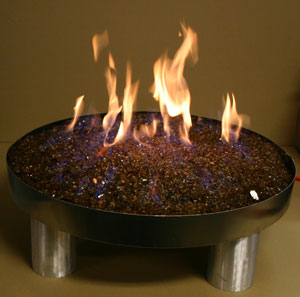
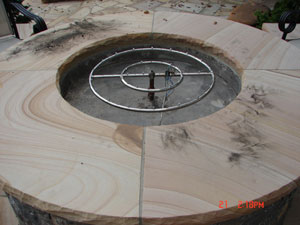
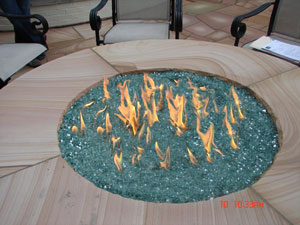
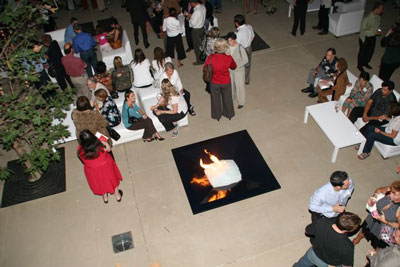
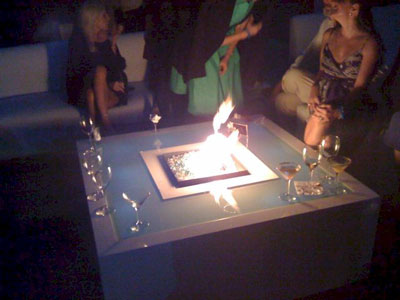
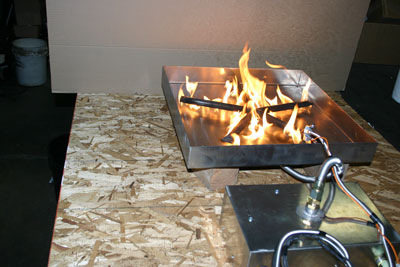
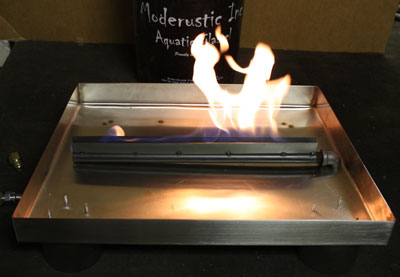
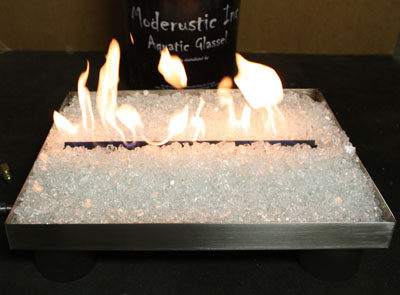
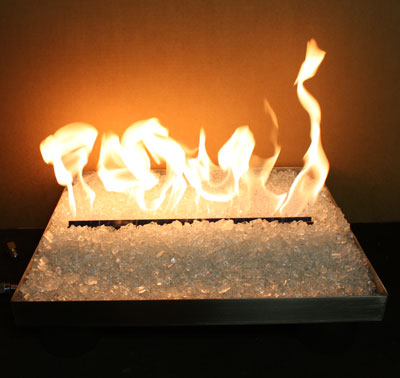
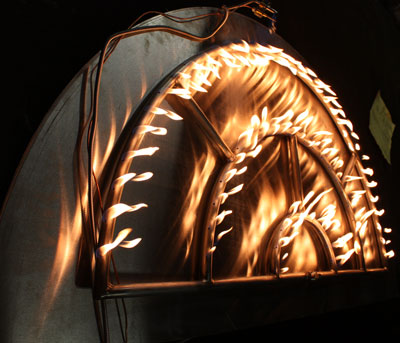
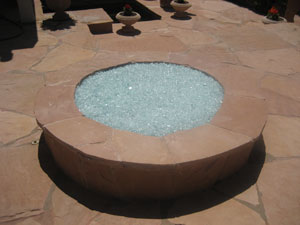
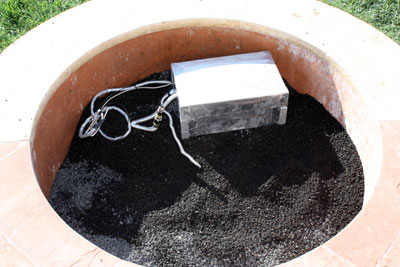
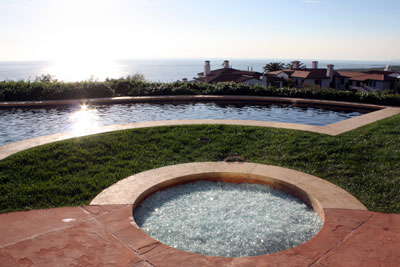
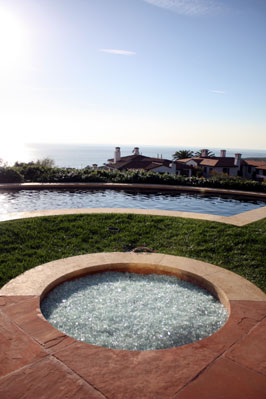
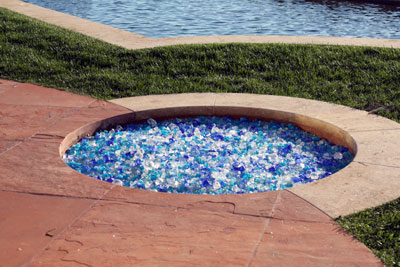
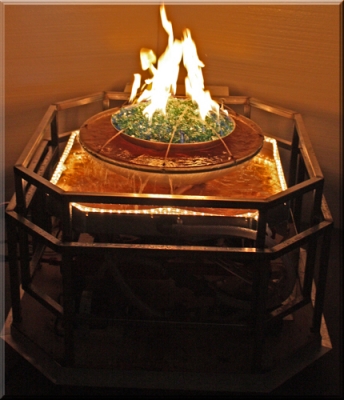
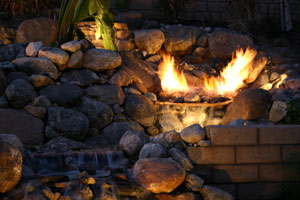
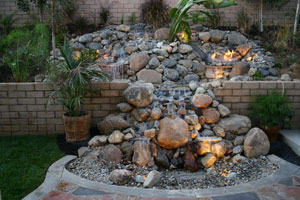
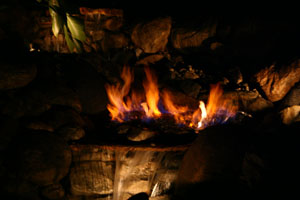
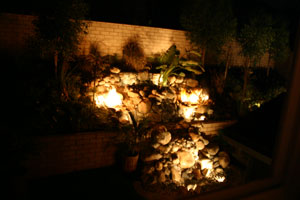
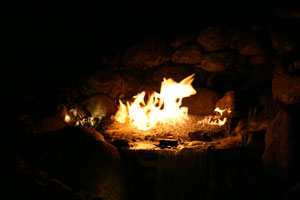
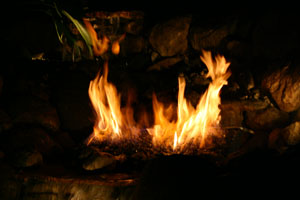
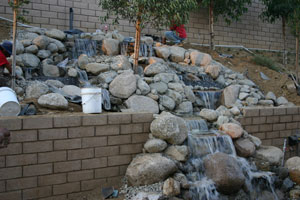
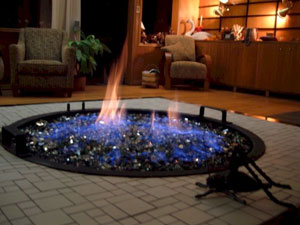
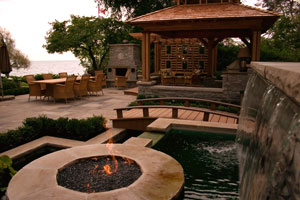
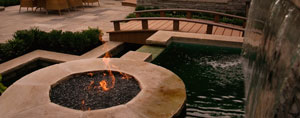
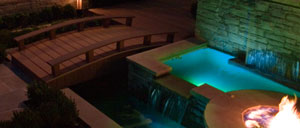
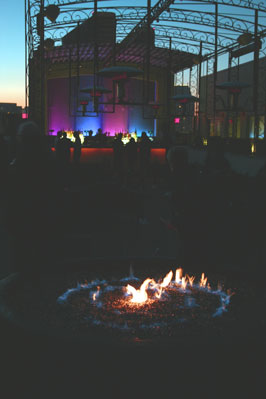
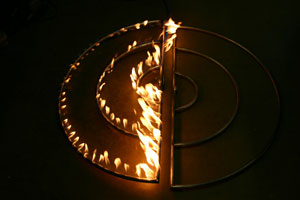
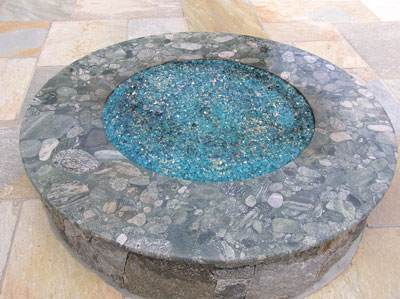
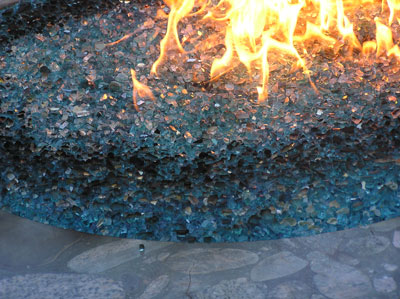
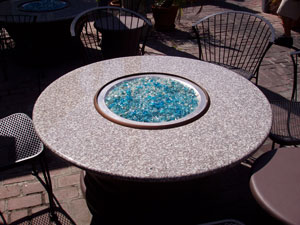
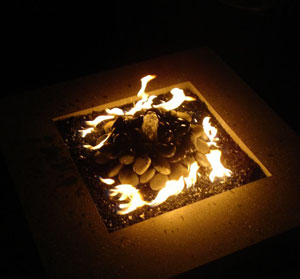
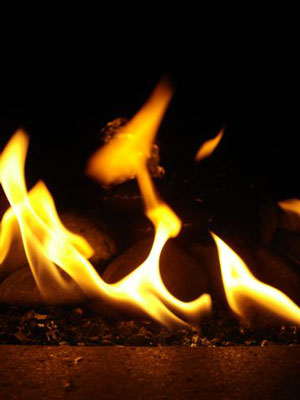
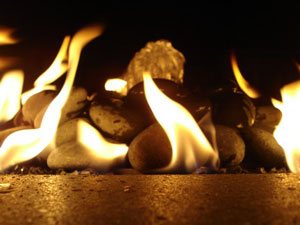
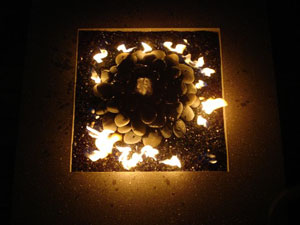
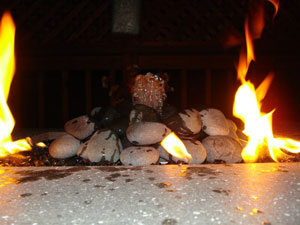
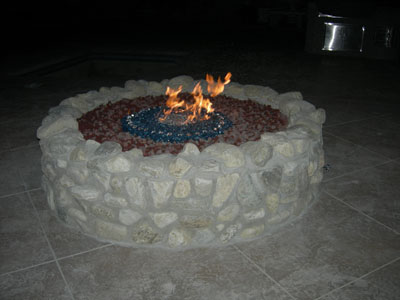
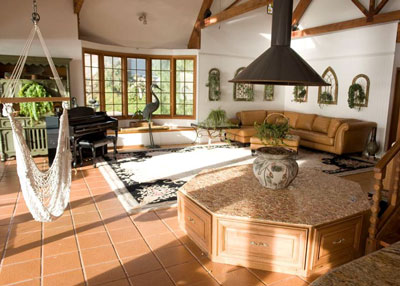
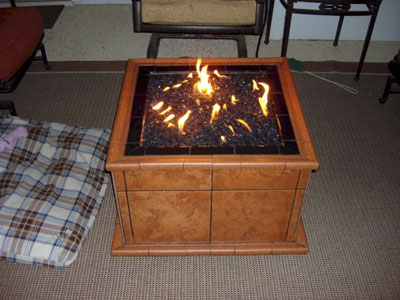
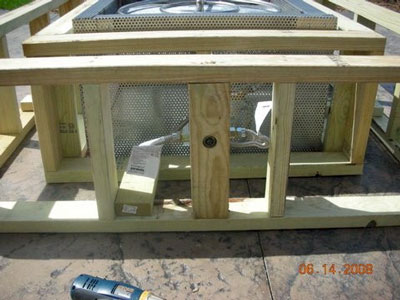
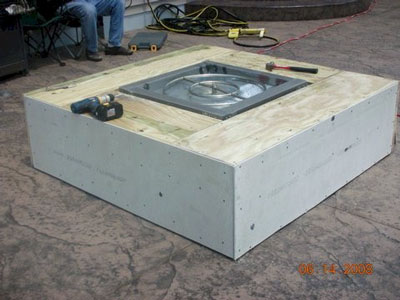
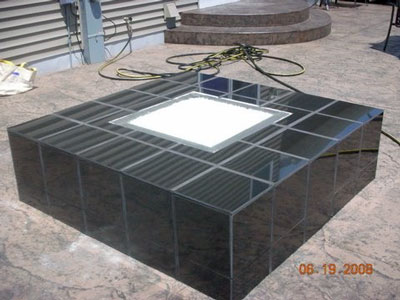
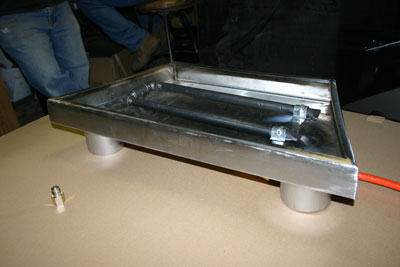
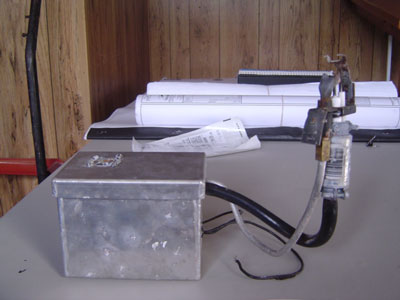
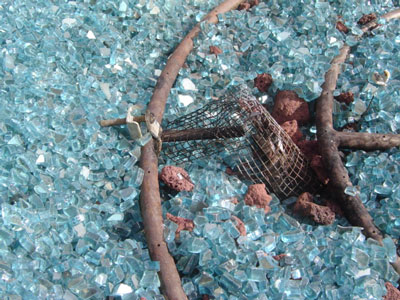
The fire pit below is a new project for us and is still being modified to this day. We are now planning for the fiber optics in all 14 waterfalls! If you look carefully you will see then before we install the lighting. We have been working with new ways of altering fire and we have found how to burn hydrogen! For now you will see the flame change to a lighter more orange flame when the hydrogen hits the fire. We have found how to make fire tornadoes in the process, which makes for a spectacular flame effect! Now for the pictures. We also installed a complete mister system all around the water fall and fire pits to help with the hydrogen.
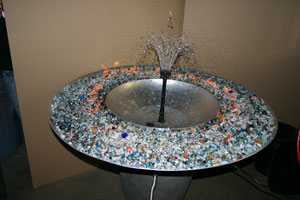
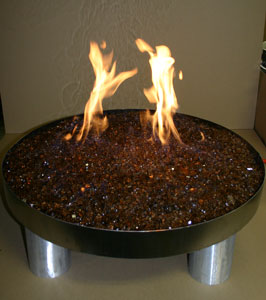
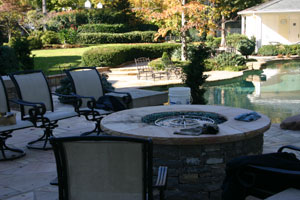
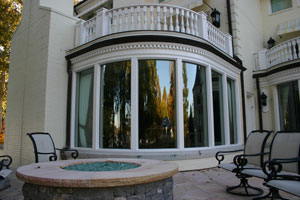
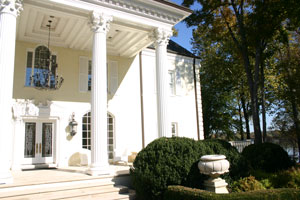
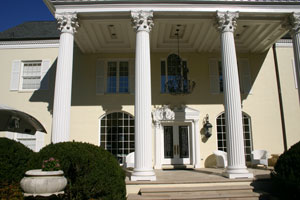
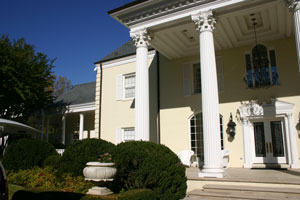
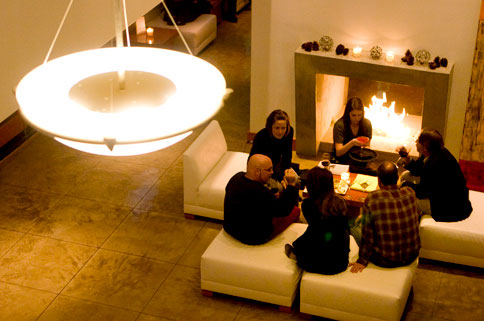
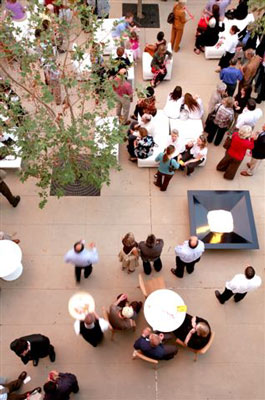
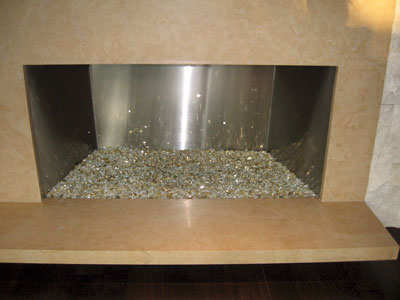
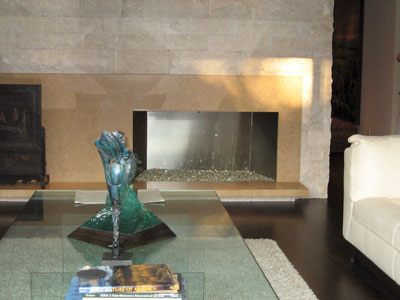
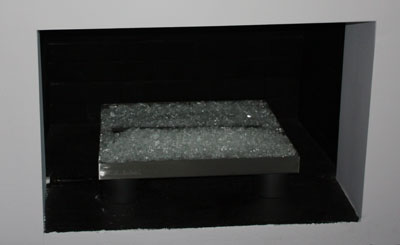
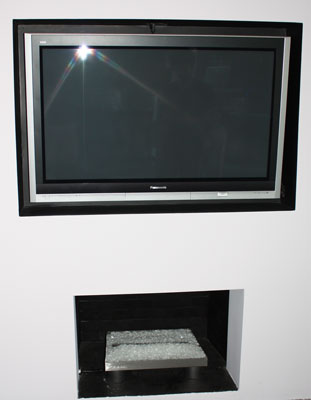
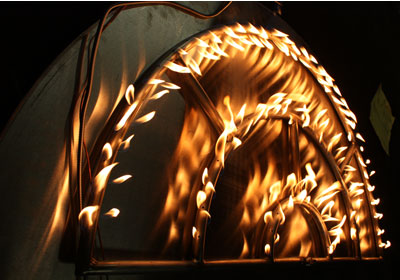
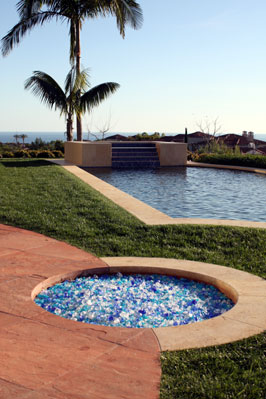
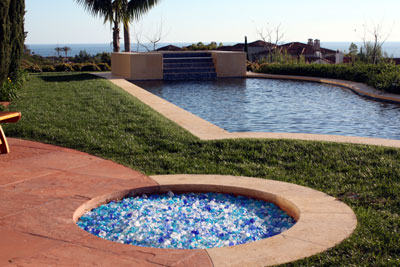
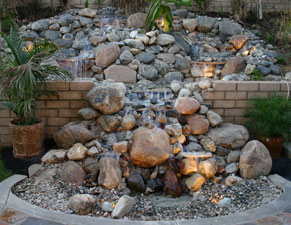
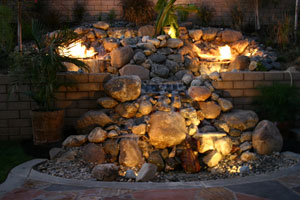
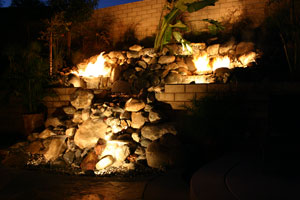
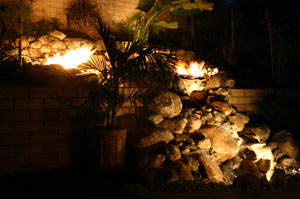
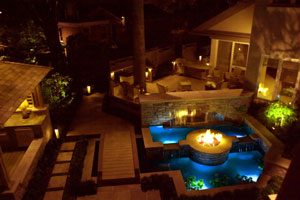
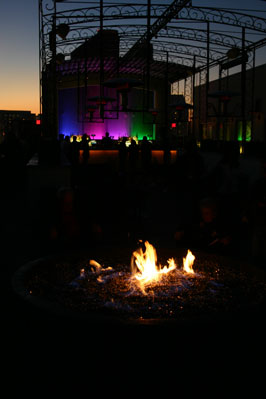
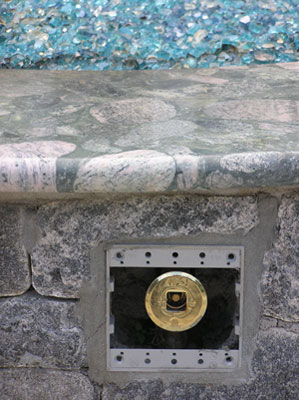
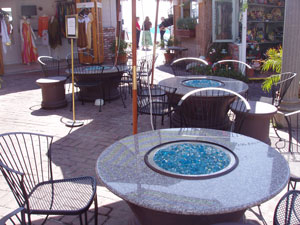
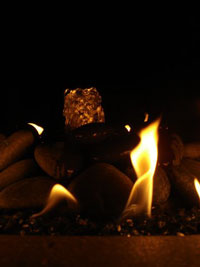
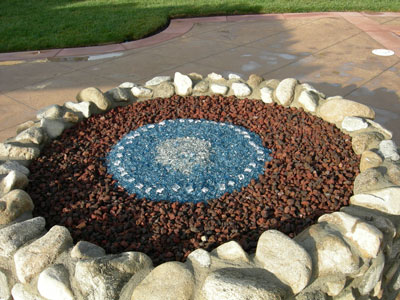
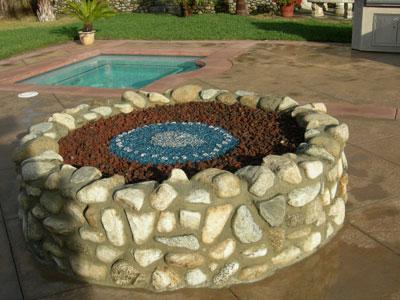
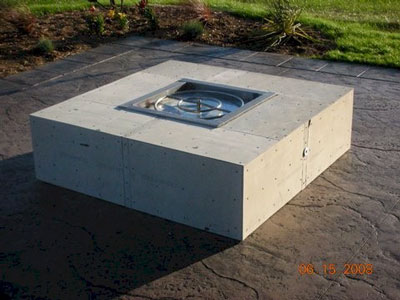
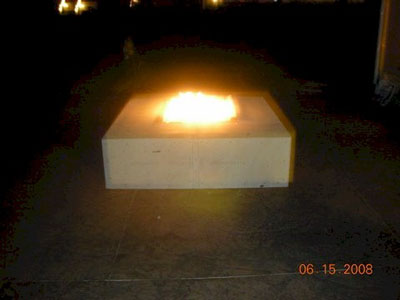
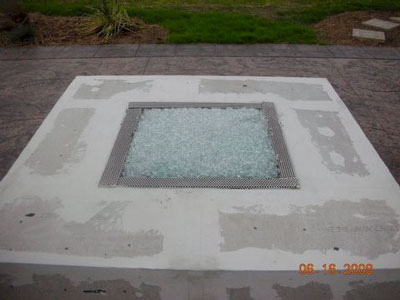
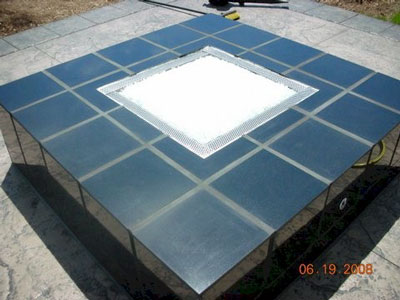
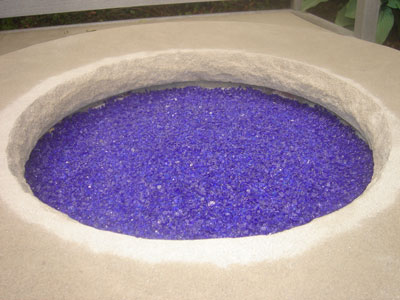
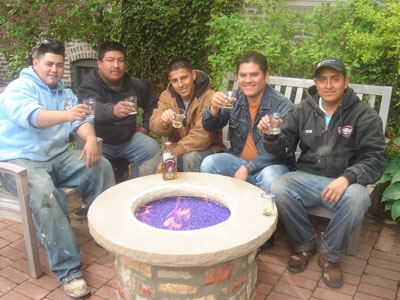
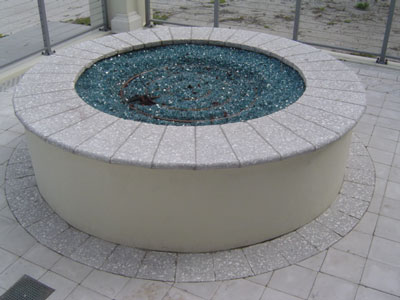
The 2 below are at dusk with no fire and only lightssol


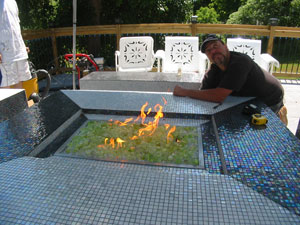
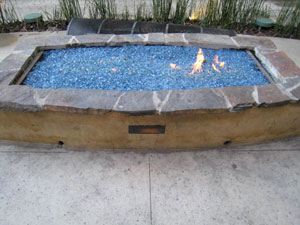
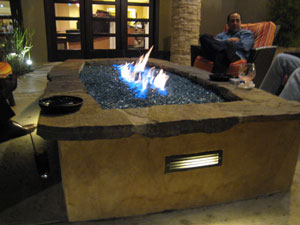
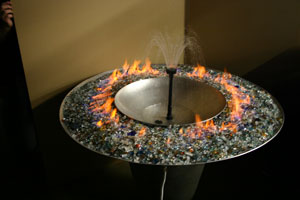
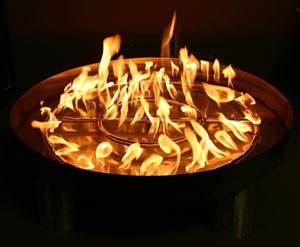
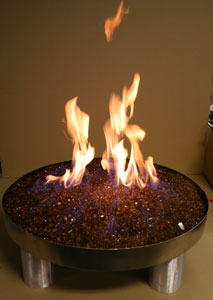
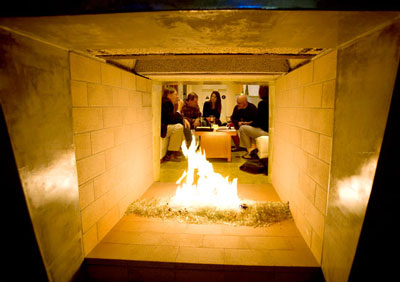
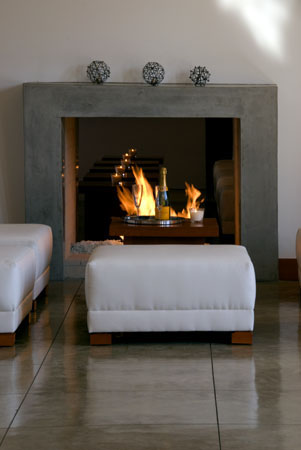
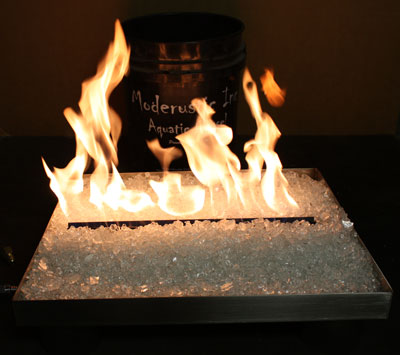
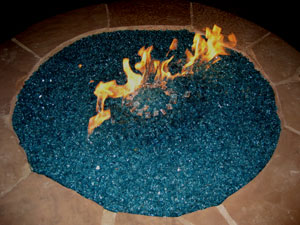
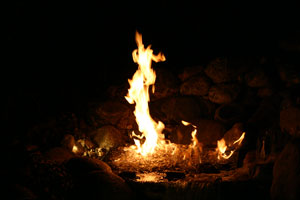
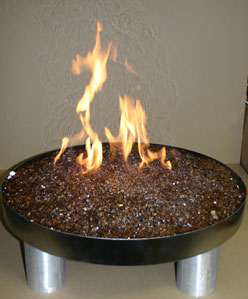
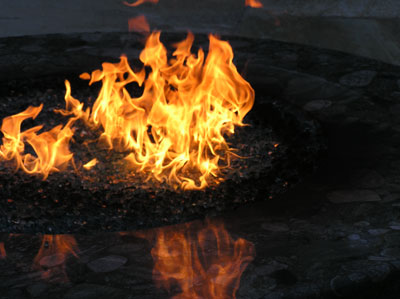
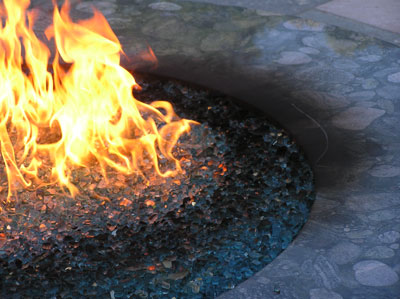
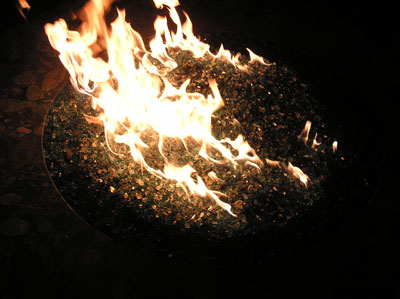
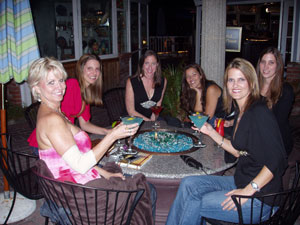
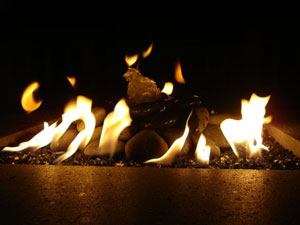
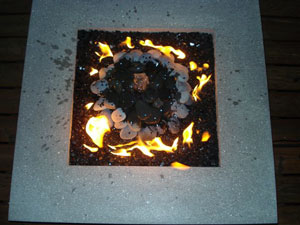
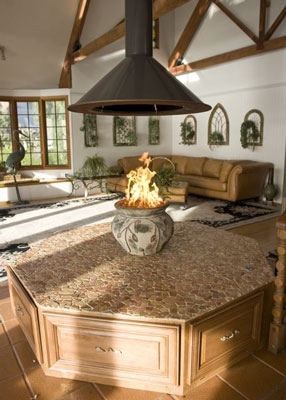
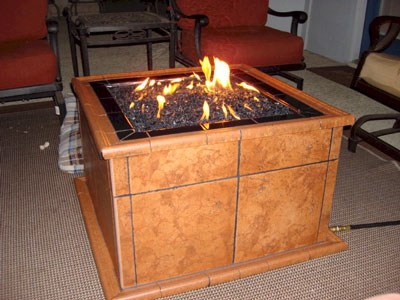
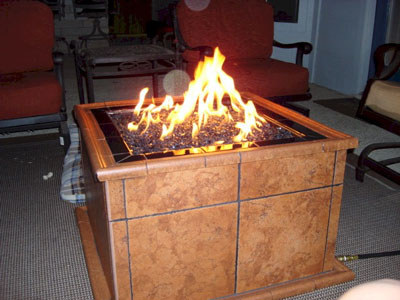
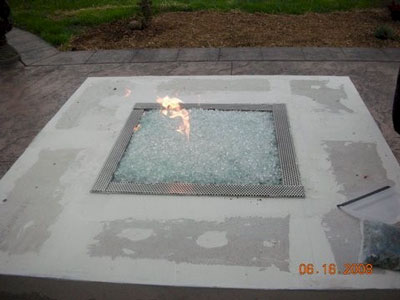
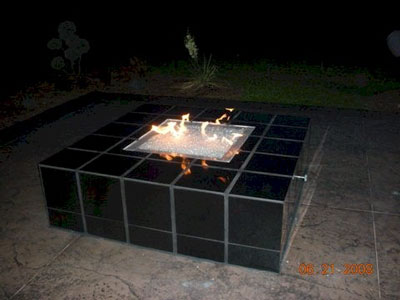
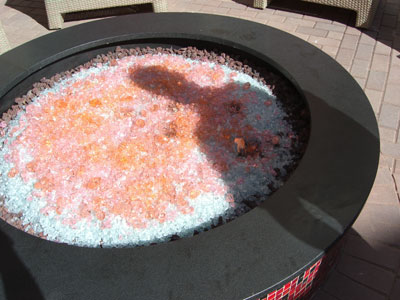
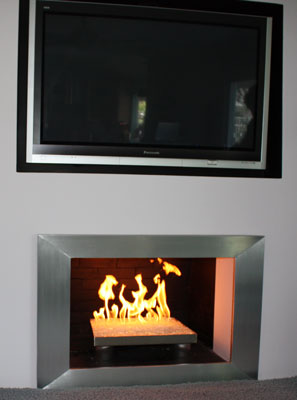
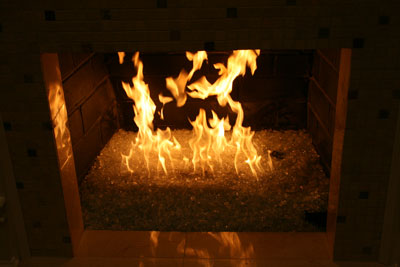
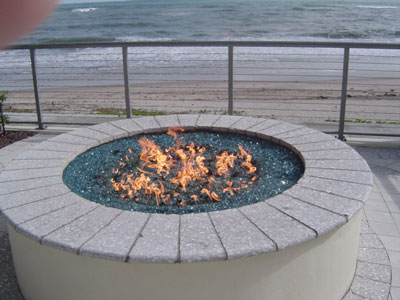
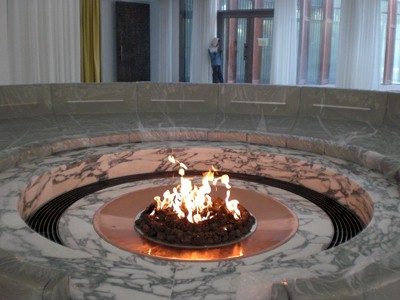
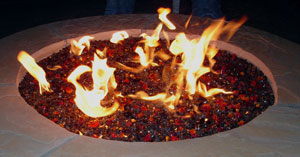
The one above is with the flames starting
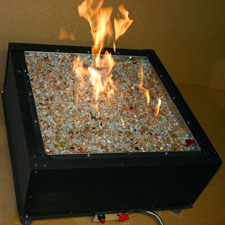
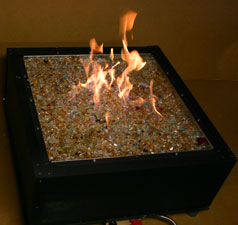
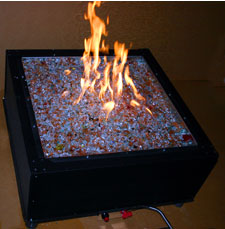
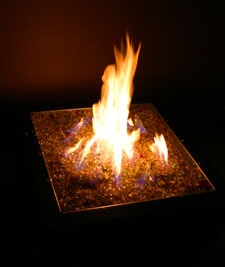
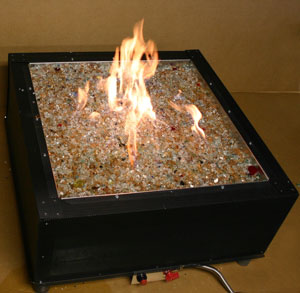
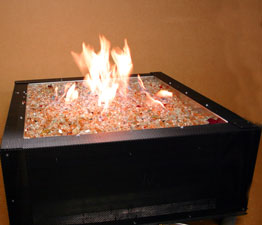
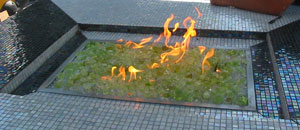
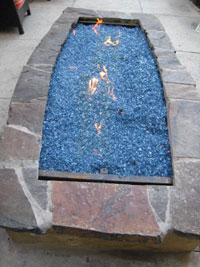
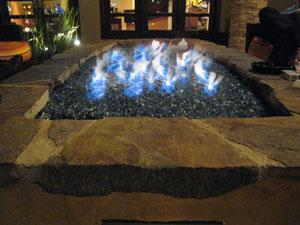
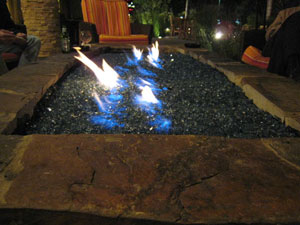
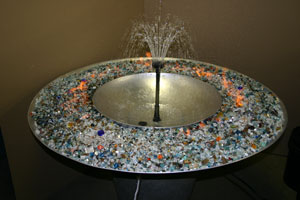
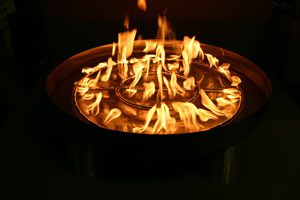
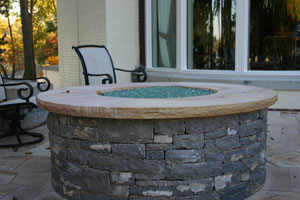
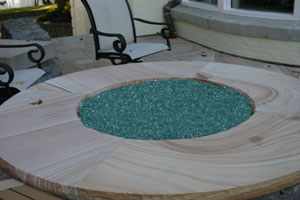
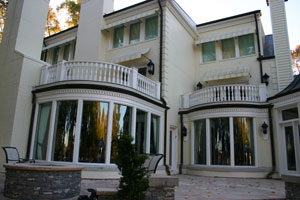
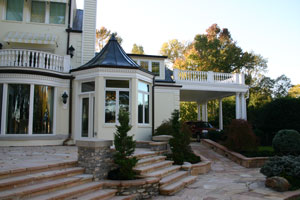
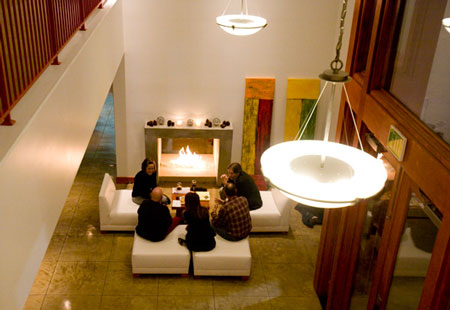
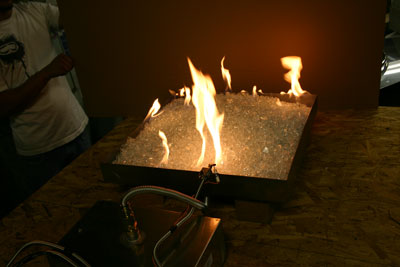
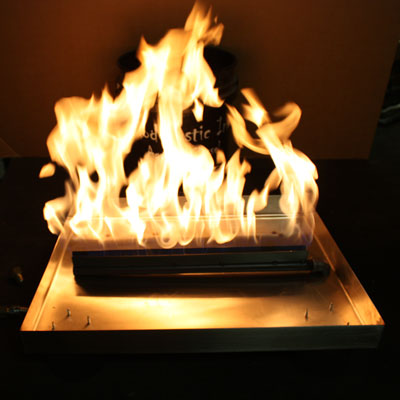
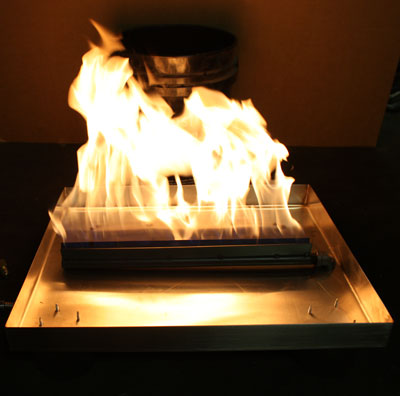
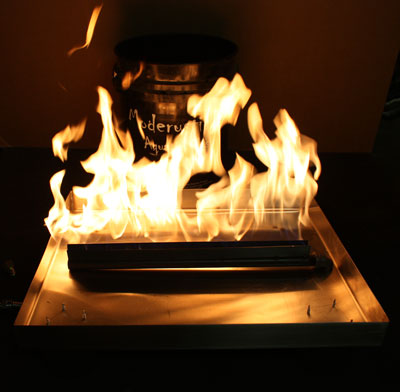
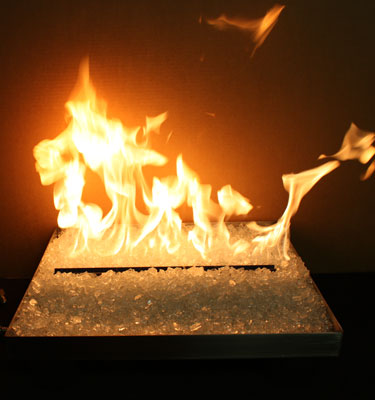
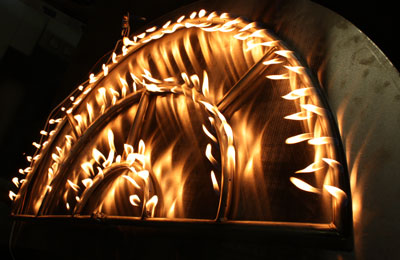
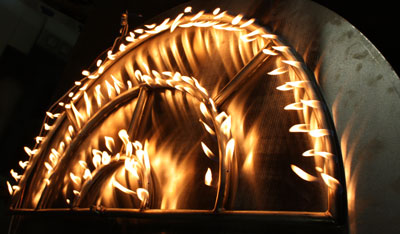
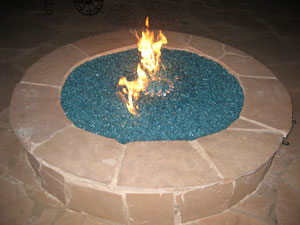
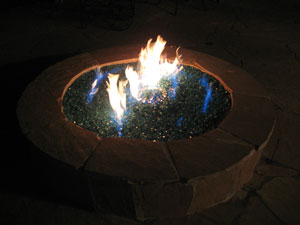
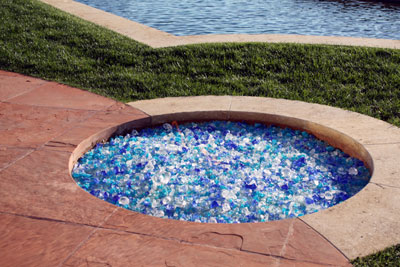
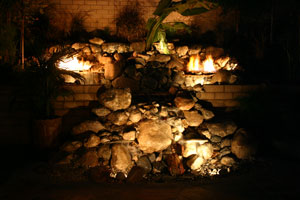
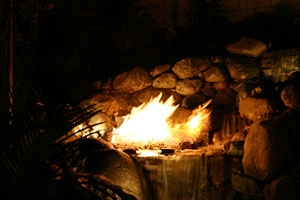
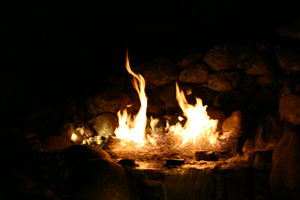
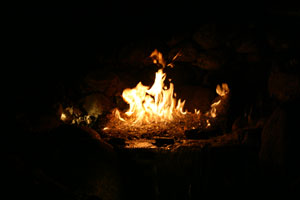
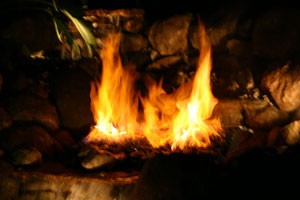
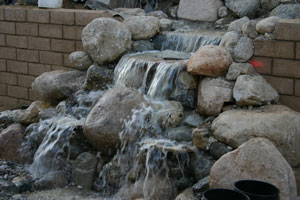
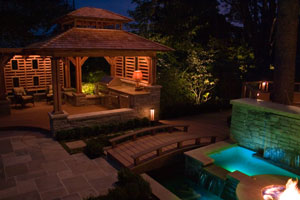
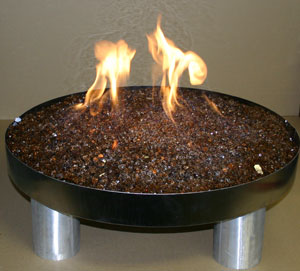
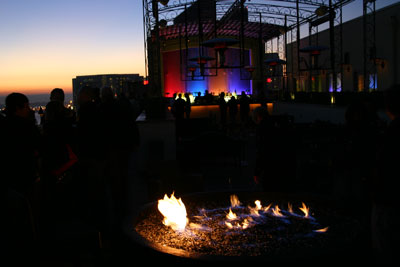
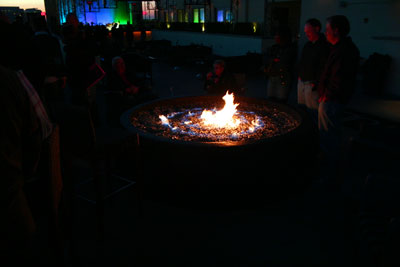
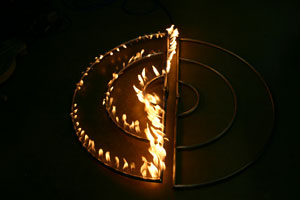
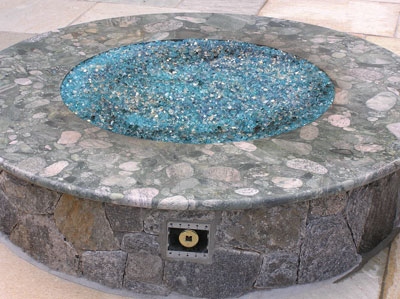
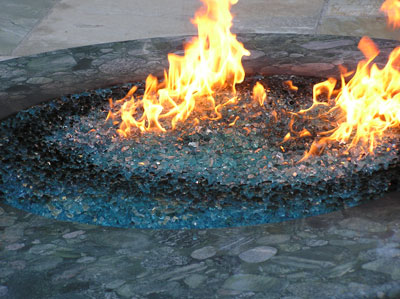
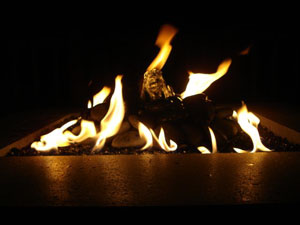
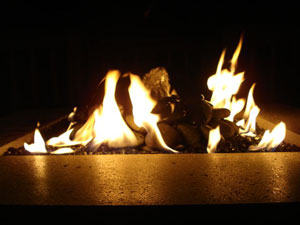
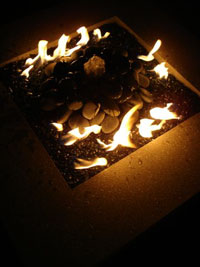
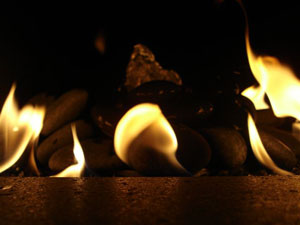
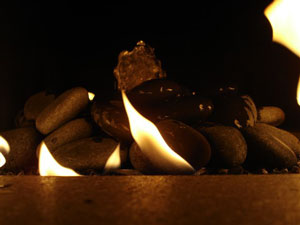
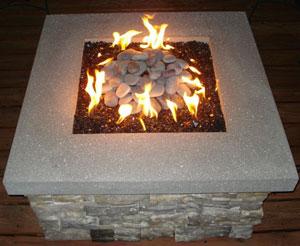
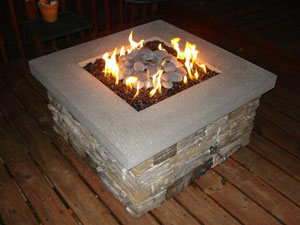
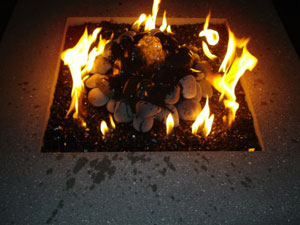
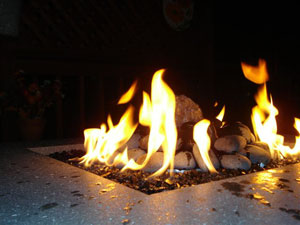
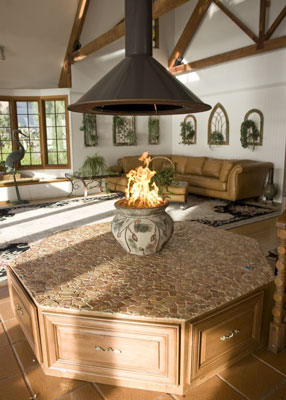
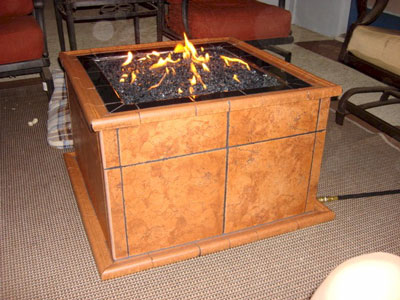
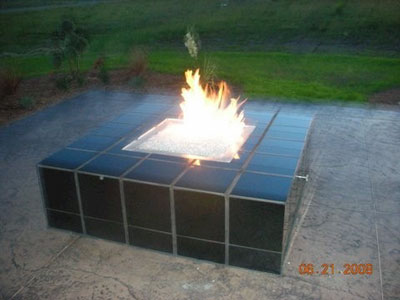
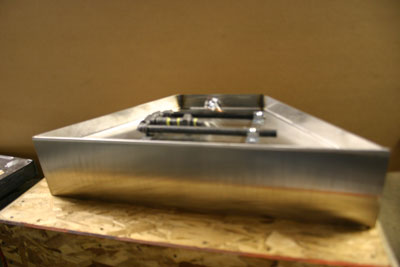
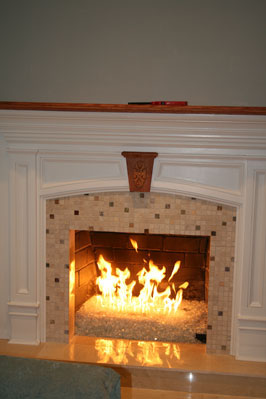
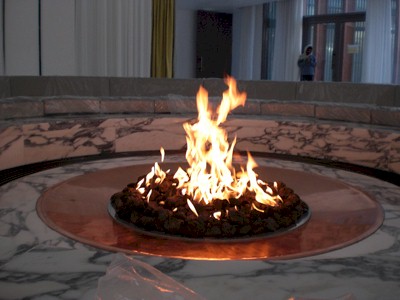
The 2 below are of the right side and a full shoot
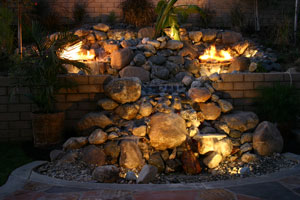
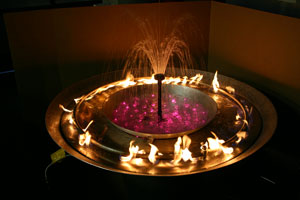
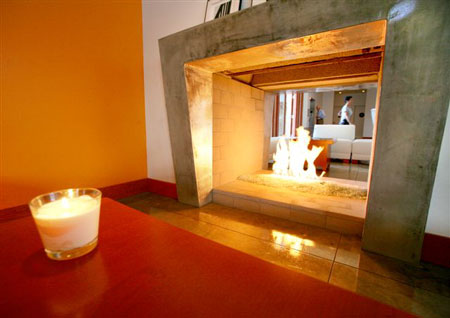
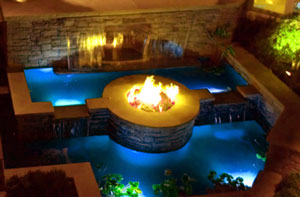
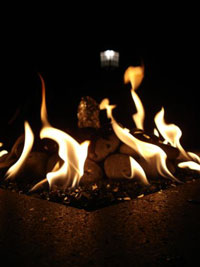
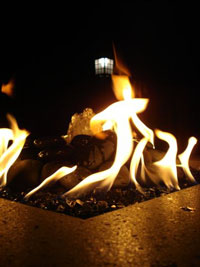
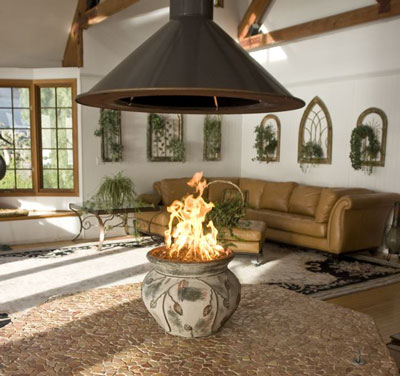
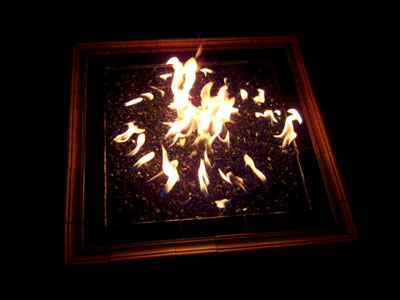
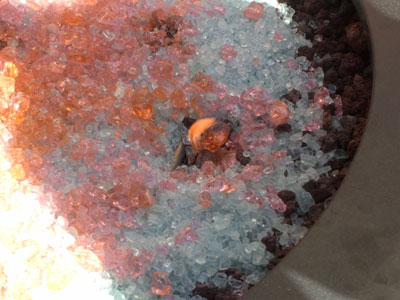
Do you see the face the water fall makes with the fire on? We call it a Pirate!
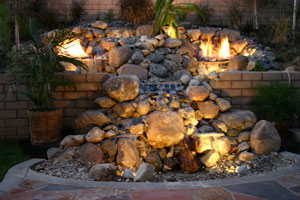

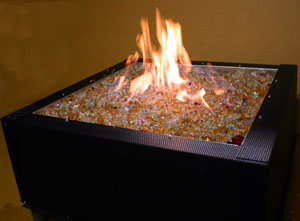
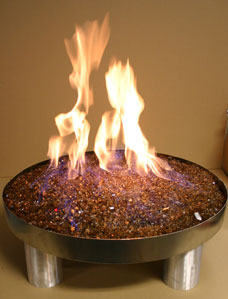
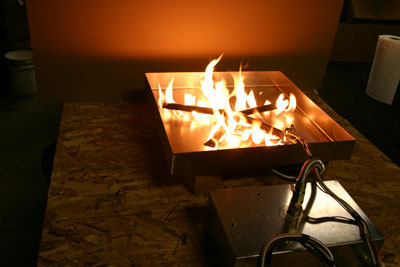
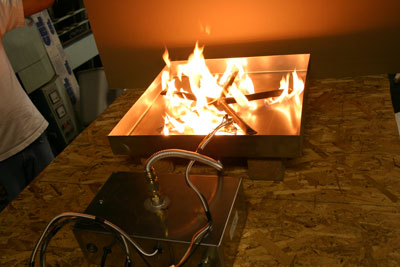
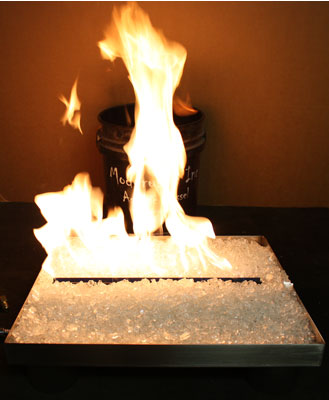
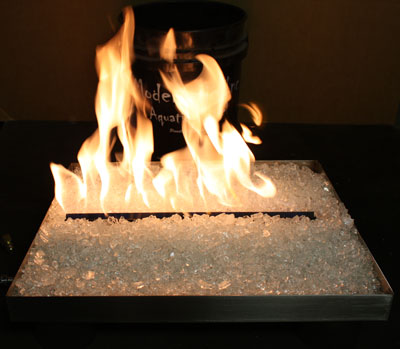
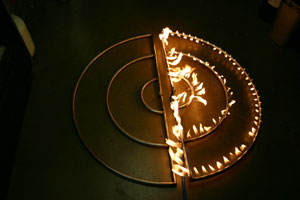
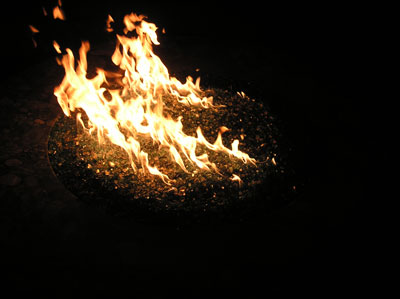
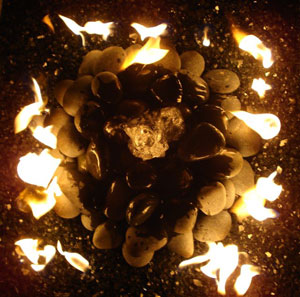
You can see the fire changing in the pictures above and below.
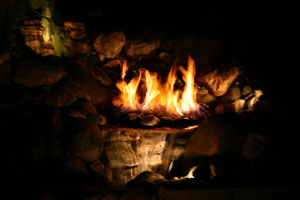

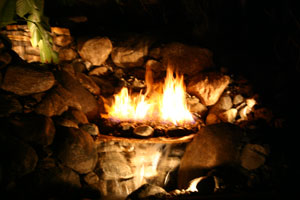


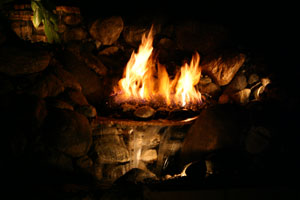

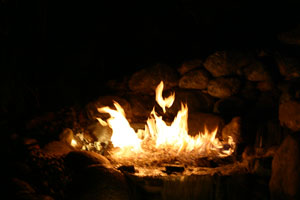


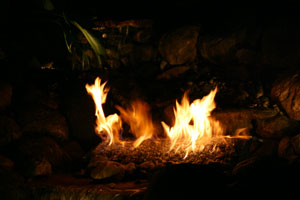

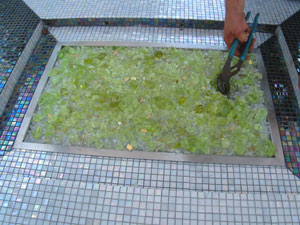
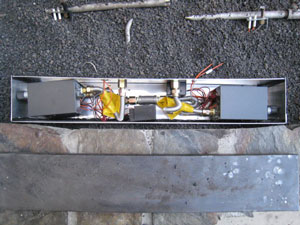
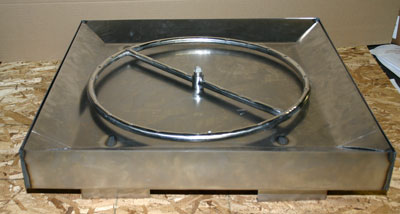
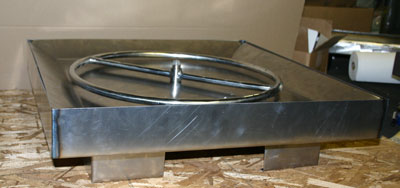
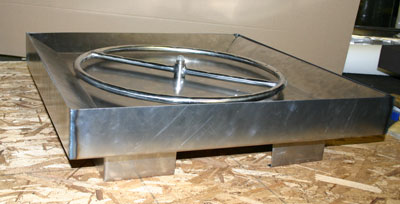
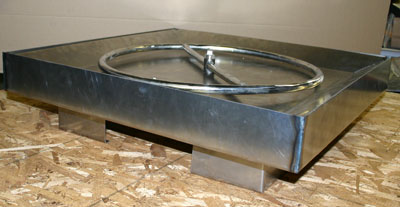
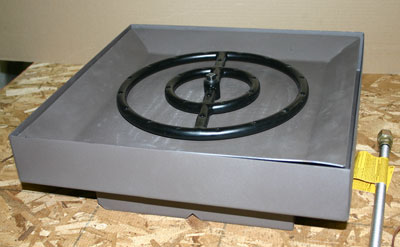
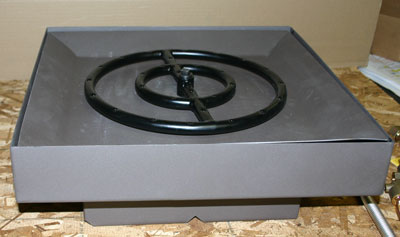
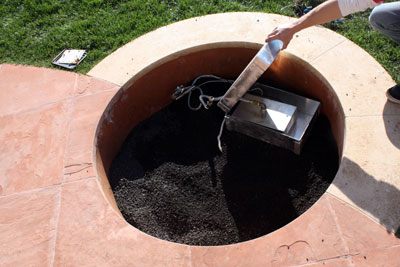
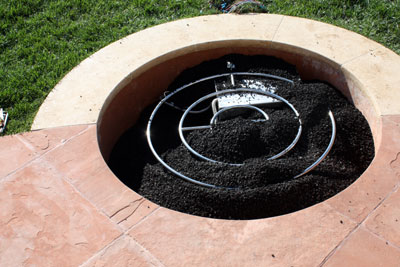
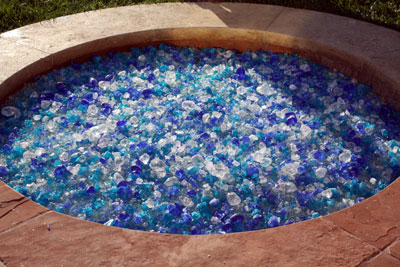
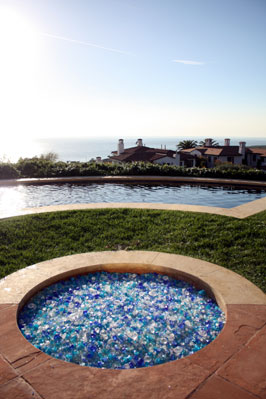
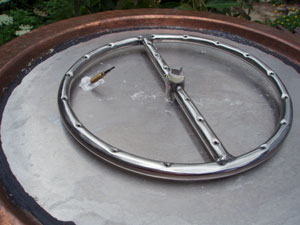
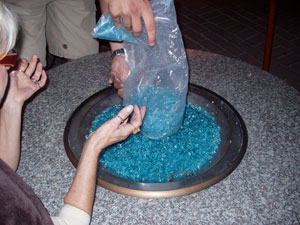
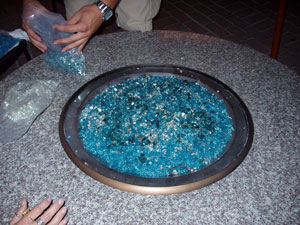
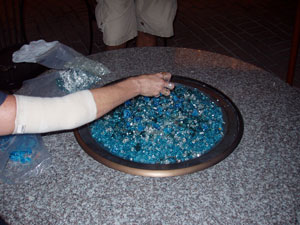
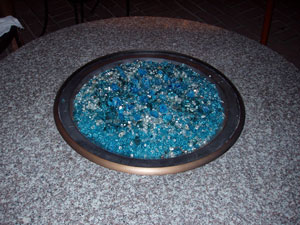
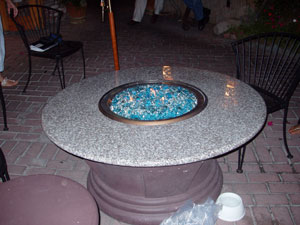
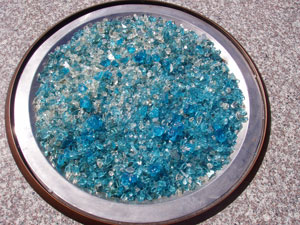
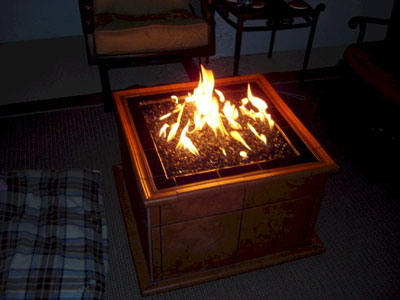
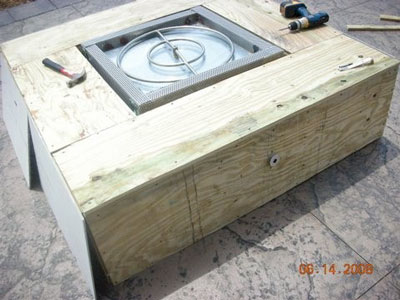
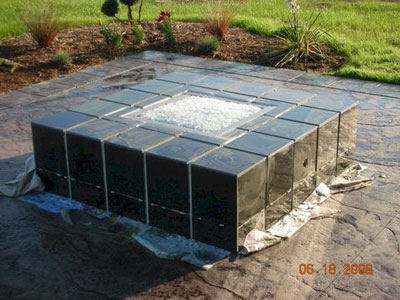
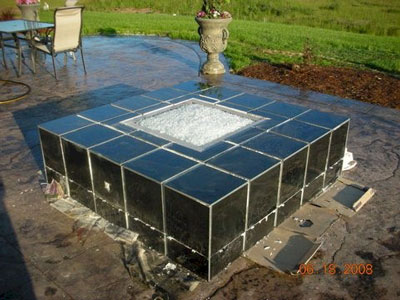
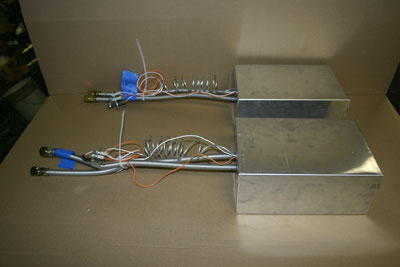
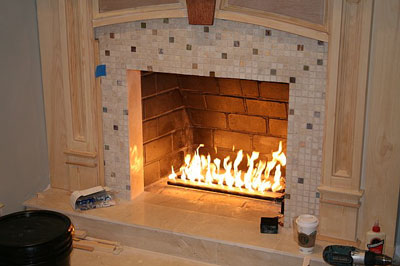
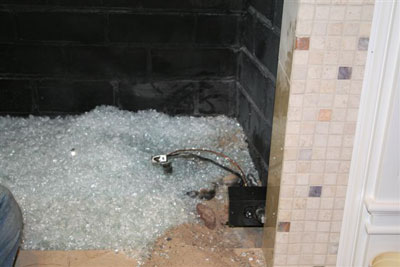
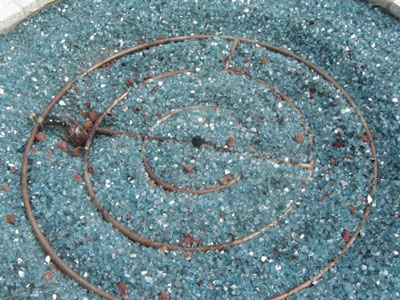
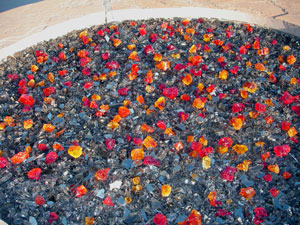
There were 2=42" stainless steel pans made and filled with 3 stainless steel burners in each pan. The water runs through the pans helping with the hydrogen. The colors used was a Bronze base and Bronze Reflective with Gold on top.
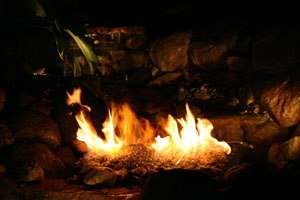
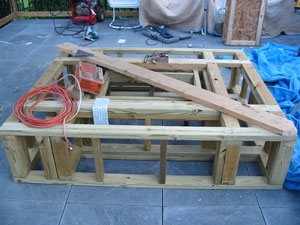
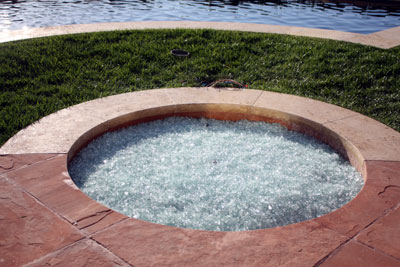
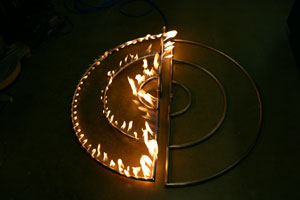
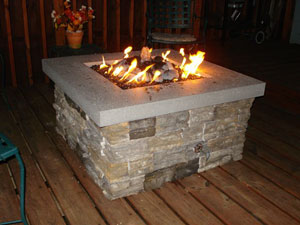
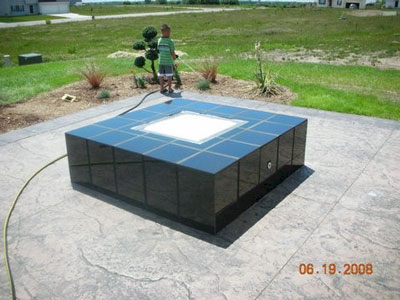
The next step is to install the fiber optics. Keep checking back!
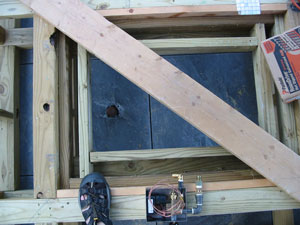
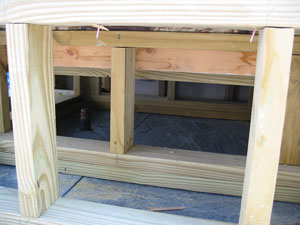
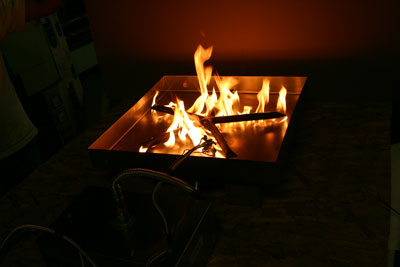
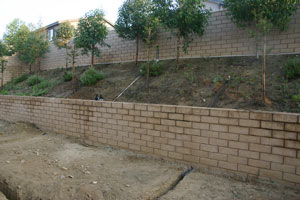
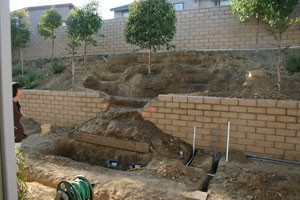
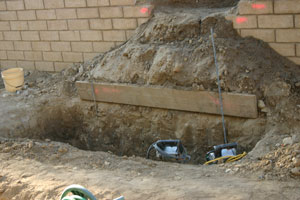
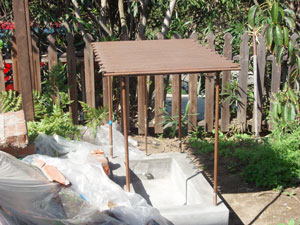
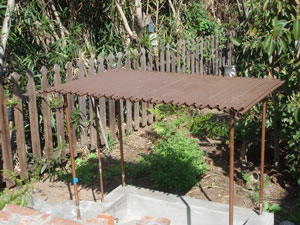
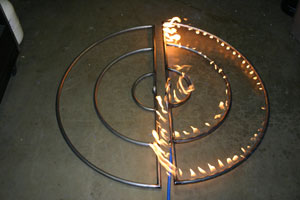
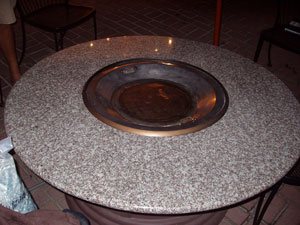
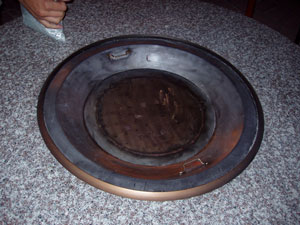
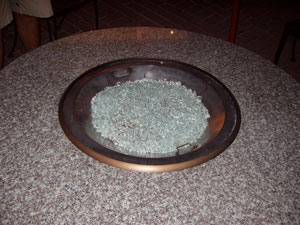
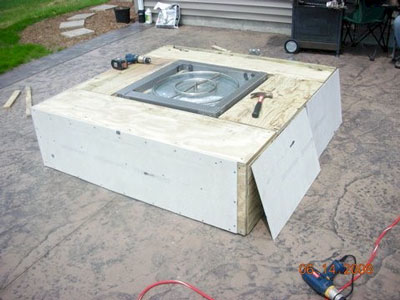
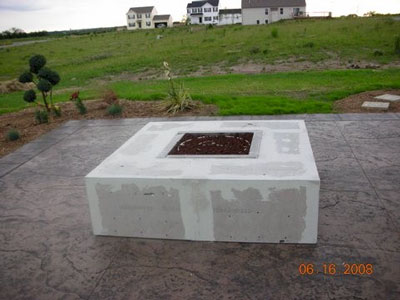
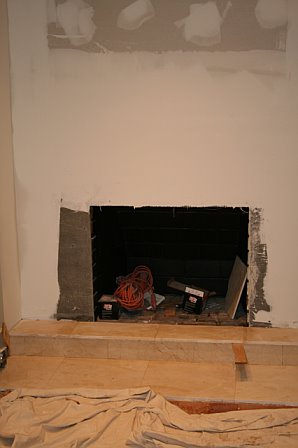
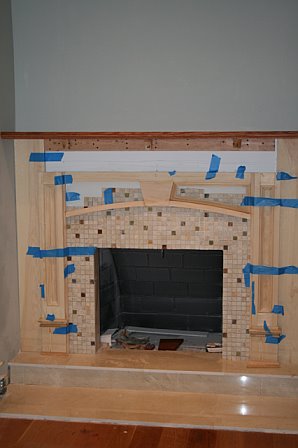
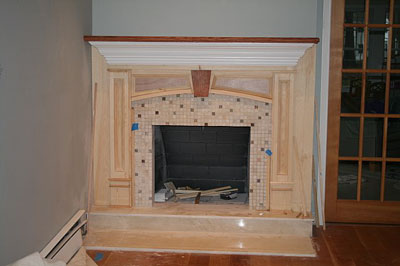
This is how it began! 5 days to finish this project.

__________________________________________________________________________
CLICK HERE or on the pictures below to see how Knott's Berry Farm fire pit finished!


__________________________________________________________________________
____________________________________________________________________________________
Click HERE or on the pictures of the Ritz Carlton Vortex' at Amelia Island Florida to how these were built. See the Videos!

Ritz Carlton Vortex Florida from Edgar Jaunzemis on Vimeo.
Ritz Carlton Vortex Page
_____________________________________________________________________________________
Boise International Airport
Fire Water feature in the lobby/ food court
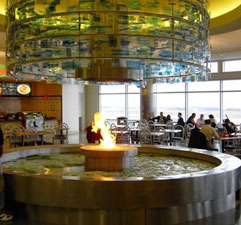
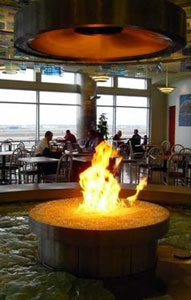 This fire pit featured Starfire surrounded by water. We only did the glass and the burners were by another company.
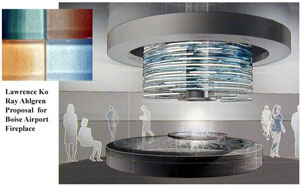
Three Public Art Projects Selected for Boise Airport
BoiseCity Council has approved the selected artists to design and build an art glass fireplace with Aquatic Glassel, a cast and fused glass wall feature, and a fabric mural for the new buildings of the Boise Airport. Art projects will complement the modern, curvilinear architecture inspired by Idahos natural resources.
Project: Fireplace/Water Feature Artists:Lawrence Ko and Ray Ahlgren from Portland, Oregon and Moderustic of Rancho Cucamonga, California
Budget: $155,000 Site: Food Court in New Terminal Completion: September 2004
Sponsored by:Boises Percent-for-Art, Aviation and Public Transportation Department
A fireplace made of glass (Aquatic Glassel) with a surrounding water basin feature inspired by the stepped landforms of the Boise Riverbanks and nearby reservoir will act as a beacon of light within the new food court area. Sited below a skylight, the fireplace will be a focal point and gathering space for travelers.
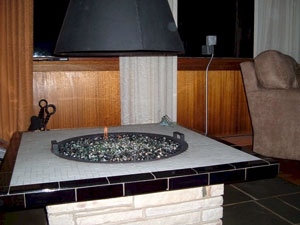
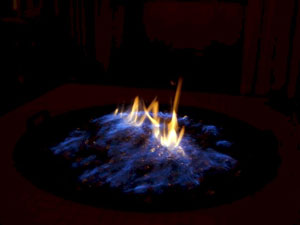
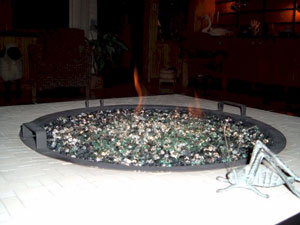
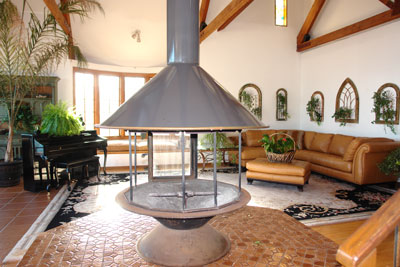
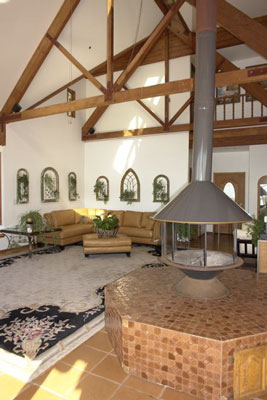
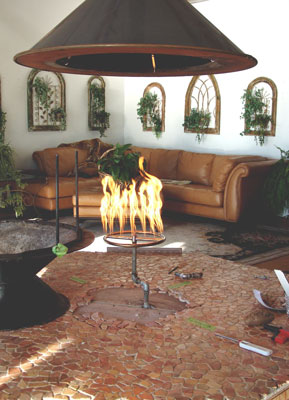
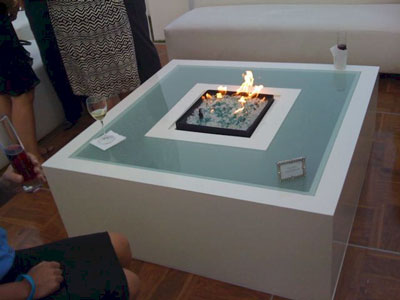
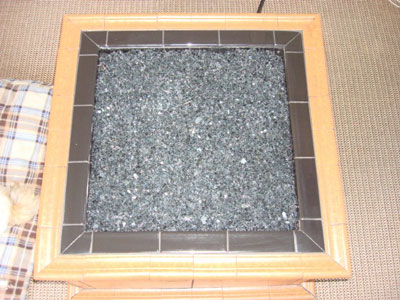
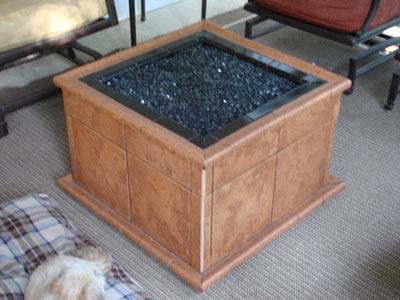
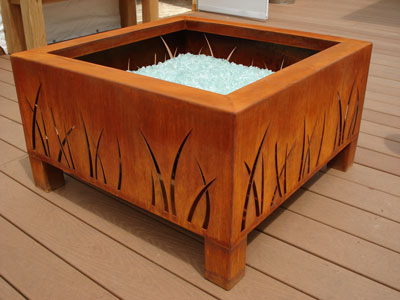
The indoor fire table below has:
Bronze, Black, Emerald Green, Reflective Green, Black Reflective and Gold
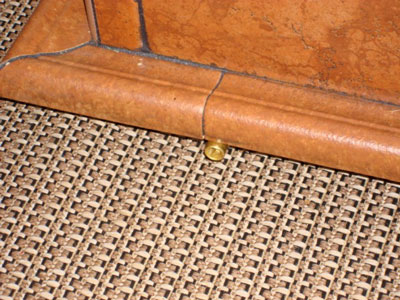
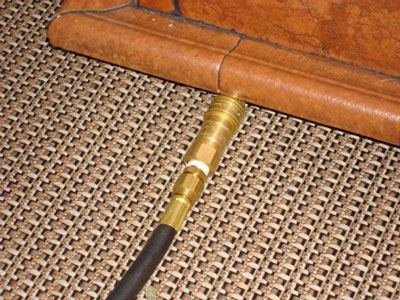
The propane conversion was here in Southern California. Crista brought the bowl and we did the rest.
Crista brought the top pan and lid and we installed a propane burner We installed one of our FPPK kits (fire pit propane kit)


This is the table Crista built to hold the copper pan/ bowl
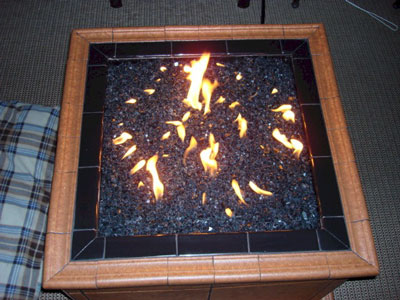
The fire pit/ table is at the Roxbury Hotel and we will show you the progress here from beginning to end. This was a propane installation with our FPPK burner. The colors used were:
1/4" Starfire, 1/2" Starfire, Gold, Lime Green Topper, Pale Olive Green Topper, Olive Green Topper,a little bit of wood and tile and here you go!
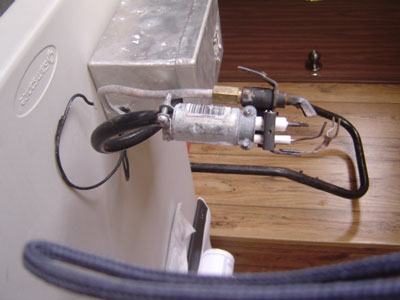
Above shows the framing and the gas line coming in.
Below shows the pipe coming out of the floor and the thermo-coupler on the glass next to the igniter
Roxbury Hotel, a cool fire pit!
The fire pit below has Bronze and Bronze Reflective installed and is located in Canada. This is one very nice backyard make over!
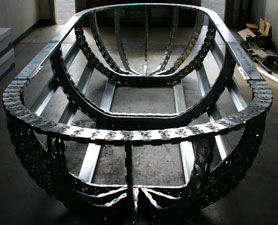
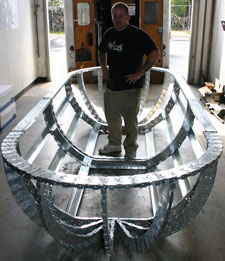
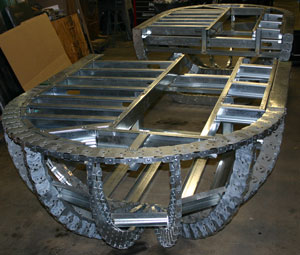
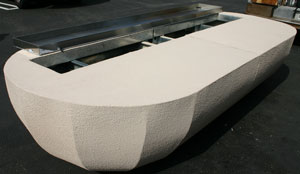
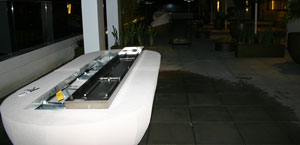
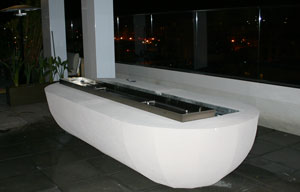
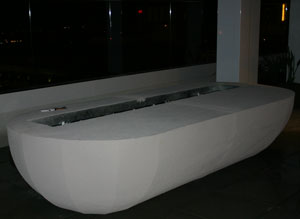
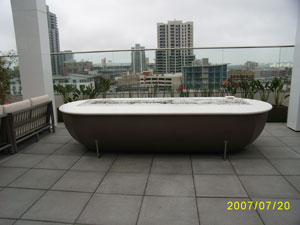
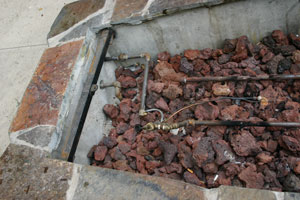
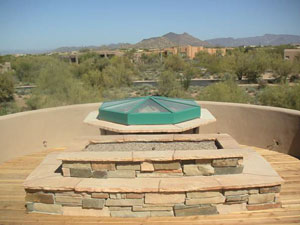
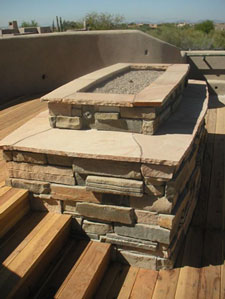
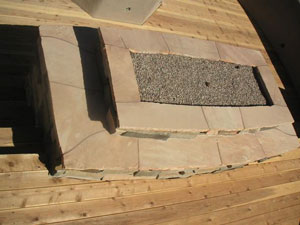
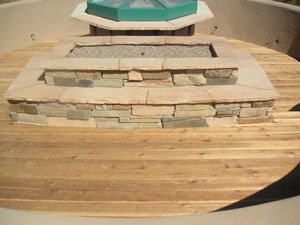
The first project we are working on is the Maryland Hotel (Ivy Hotel now) Roof Top Fire Pit in downtown San Diego, California on the 7th floor roof top!
It measures 60" across, 30" tall and 144" long!
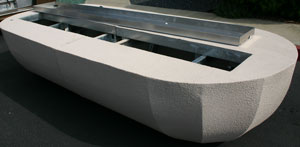
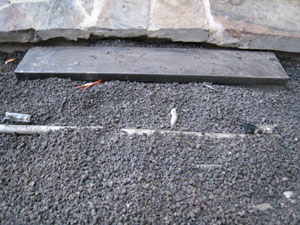
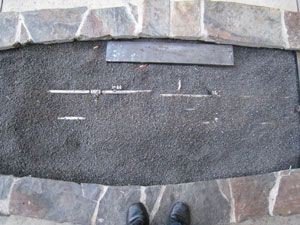
The fire table/ fire pit will and a 5' x 12' surface top in smooth concrete with a 16" x 120" stainless steel fire tray of to one side. We will post pictures as the project grows on.
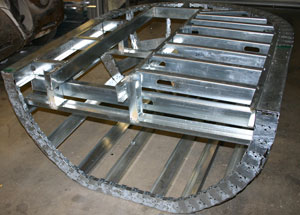
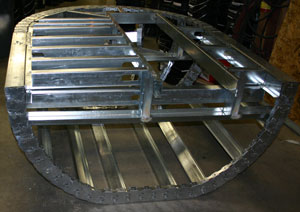
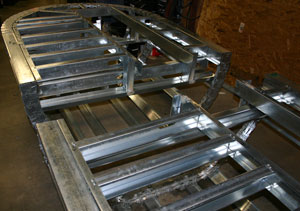
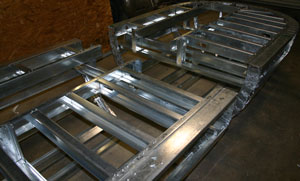
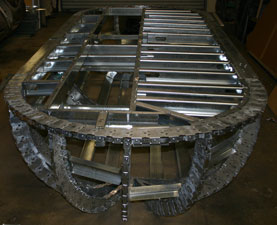
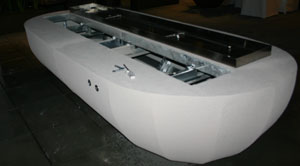
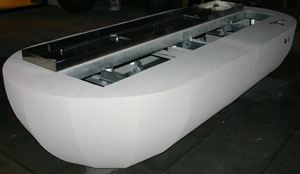
Te fire pit is constructed with a new flexible track and about 3,000 screws, 240' of galvanized channel, 450 welds, 600 lbs of GFRC/ Wonder Board and coated in smooth texture concrete.
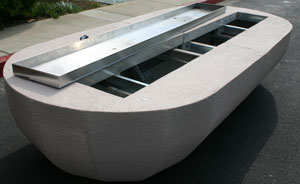
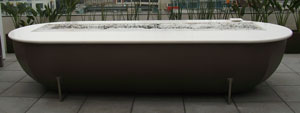
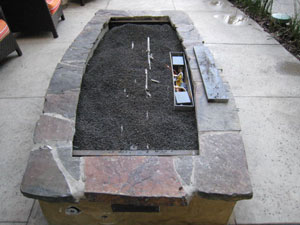
This was just before delivery, dry fit.
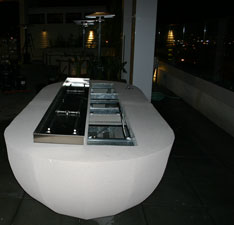
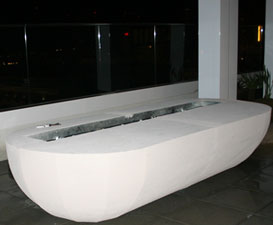
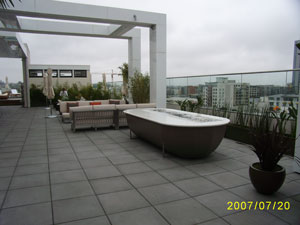
Once on the roof top the two halves were attached and the pan was installed
There were two burners and two controls installed
The glass is going in after the position of the fire table was adjusted. Pictures will be here soon!
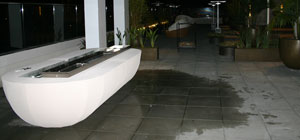
If you look at the walls of the roof top you can see most of San Diego.
The table now has had a different coat of colored concrete applied and a granite top. The glass that is installed is Starfire. The Hotel plumber was not very careful as he mixed the lava with the glass and now it looks like salt and pepper. We will be taking a trip to San Diego to fix this mixing issue because we would like to post finished pictures of the fire table burning at night time.
The fire pit below will show you how not to do it (bad plumbing) and how easy it is to install a battery operated remote control. The glass used was Ford Blue and we installed 2 44" stainless steel "H" burners.
In the pictures on the top right, do you see the plumbing sticking out of the pit? Well this was fixed, but not by the plumber that tried to install it. We cut a little bit of concrete and placed the valve in properly.
Above you will see a very poor attempt of a gas burner and valve.
The picture above has our twin remotes inside the box protected from the weather.
We covered the larger lava rock with our crushed lava rock to pour a 1 1/2" ford blue base to cover the lava and burners. Unless you plan to cover your outdoor fire pit we recommend to use all stainless steel burners and parts to avoid rusting.
Once the glass covers the box, it just looks nice. To replace the batteries, move the glass on the top and the rest is simple.
The fire pit above is at the Torrance Marriott in California.
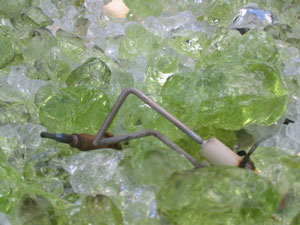
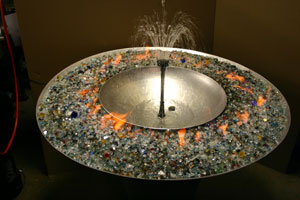
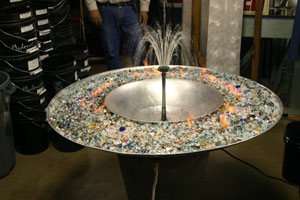
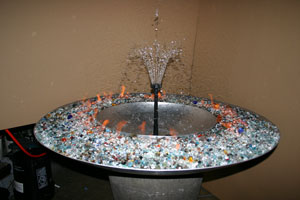
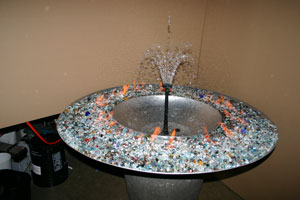
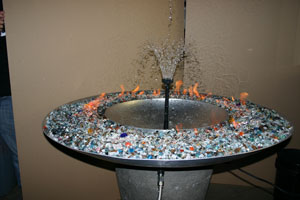
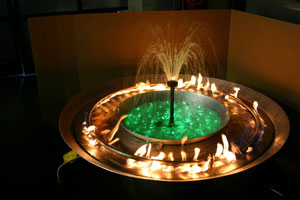
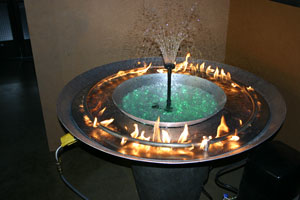
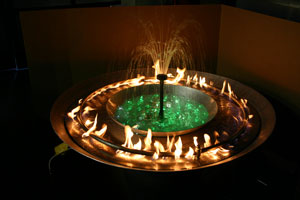
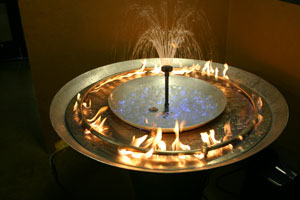
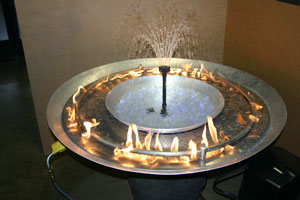
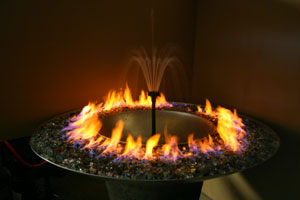
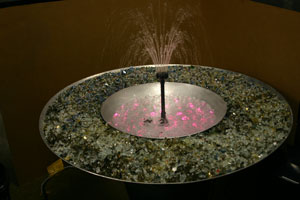
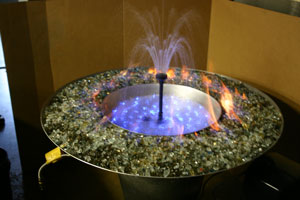
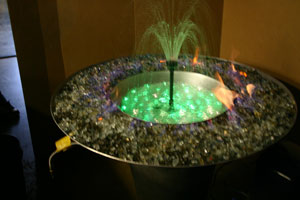
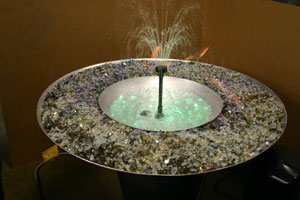
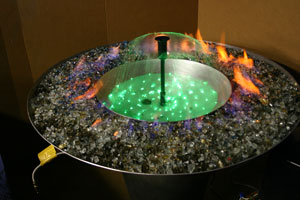
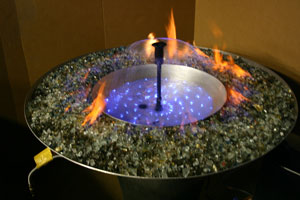
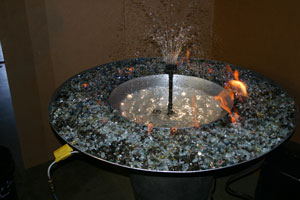
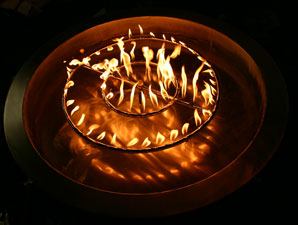
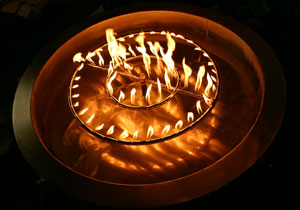
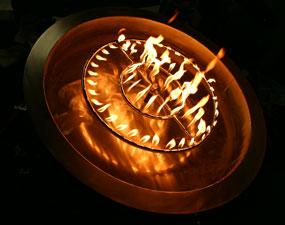
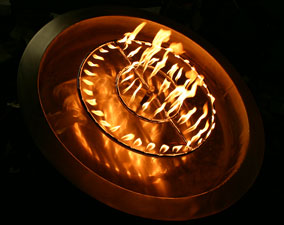
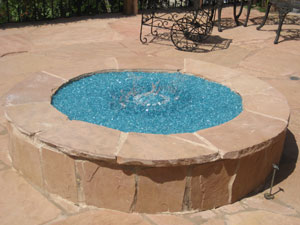
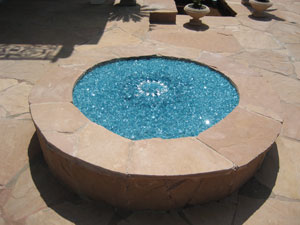
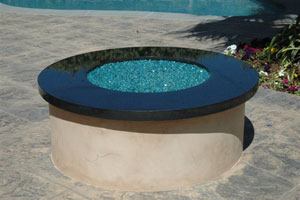
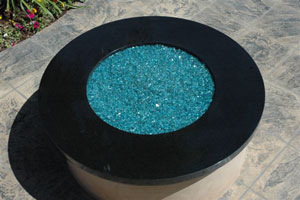
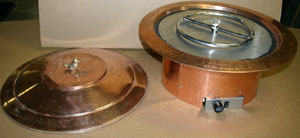
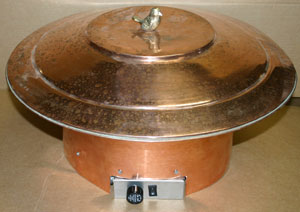
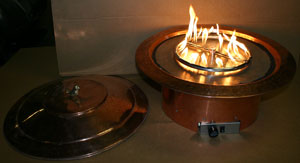
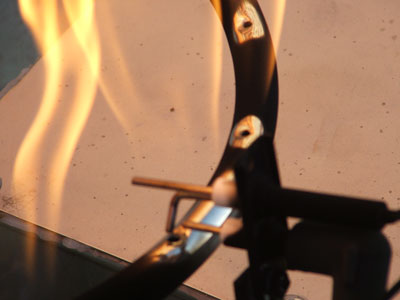
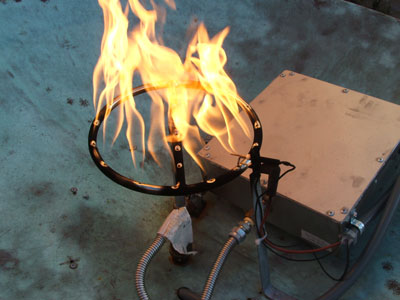
The fire bowl below is one of our newest products/ projects. The first one went to Ramsey Burton in Kentucky of which after he installs it is his ten foot granite table we will show you pictures of his project. This is a 48" spun aluminum bowl with a 24" center bowl with a water feature with fibre optics. The outer bowl has a stainless steel ring for a full surround fire feature. So here are the first proto-type pictures from the shop.
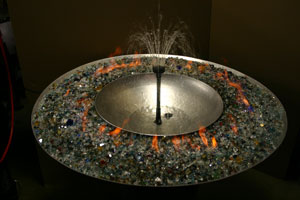
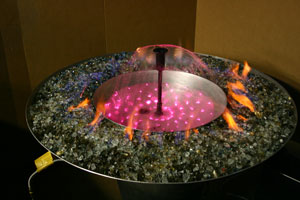
These pictures show what happens when it gets darker as the fire is attracted to the water. Opposites attract, maybe this is why most of us are still together. The question is" Who is the FIRE?"
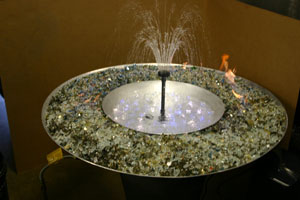
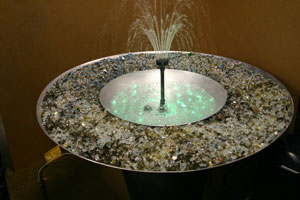
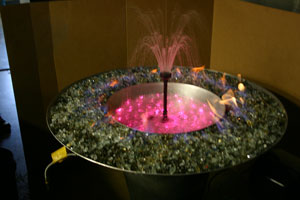
No we add the fibre optics in the center bowl.
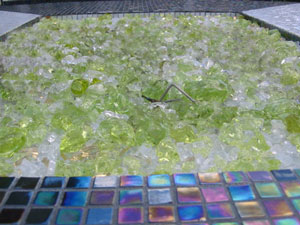
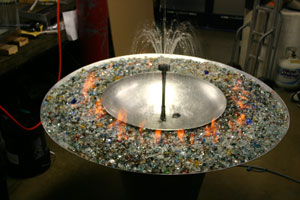
The glass we used was our Multi Mix. At least 80 colors are showing.
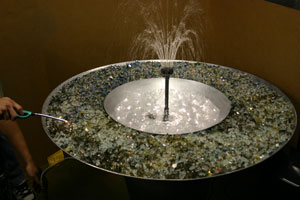
You can change the water head for a different effect.
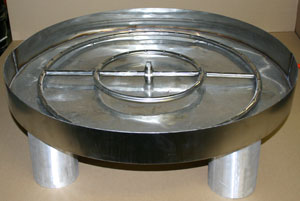
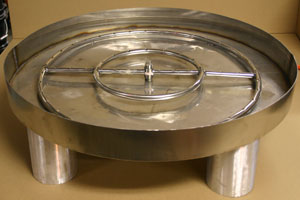
We are going to be showing this for the first time in Palm Springs on December 06 2007 on Thursday evening at the Village Fest. This is just a base you would build your table around and we can add any feature or effect you would like. We will be adding several features to this fire/ water feature in the next few weeks. We will be posting pictures from the Village Fest after the first showing. If you dream it, we will build it.
The fire pit below is a 36" round stainless steel pan with a 24" stainless steel ring. The glass is Bronze Rust Copper. This pan can easily be adapted for propane as well.
The pictures below are of the fire pit on the roof top of the Marriott in downtown San Diego in the Gas Lamp District on the 24th floor, very cool view if your ever there. The 2 half round 24" x 48" stainless steel rings were made custom for this fire pit. The glass that was used was a 50/50 mix of Starfire and Black. Very nice effect along with the view.

The half round burners below were installed at the Marriott "Gas Lamp" San Diego, California in a 72" Fire pit. We will post pictures of the finished project when we get the pictures sent to us. These were 24" x 48" stainless steel half round burners.
We used Bronze glass and stainless steel burners in this fire pit on the roof top. Great design and view.
The fire pit below is a failed attempt of a propane conversion without our help in the beginning. You can't just burn propane! If you try this, this is what it will look like. You need to calibrate the amount of air to propane or it will back fire, burn black or explode! We recommend a thermo coupler, air mixer/ venturi along with several other important factors. We won't tell you who tried this but we will tell you we did fix the issue and now the customer is very happy. We did use Azurlite with Azurlite Reflective.


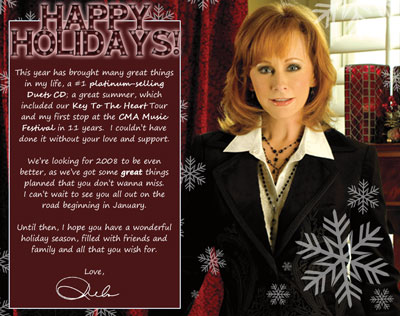
Below we have the fire pit that we installed for Reba! In Nashville Tennessee.
Here is her stainless steel fire pit pan as we manufactured it for propane with electronic ignition.
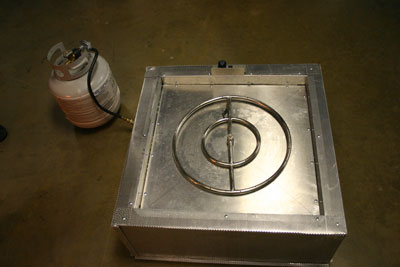
Below is a 36" aluminum pan burner for propane with a 3" outside lip. These can be made to fit any fire pit, fire table of fire fit for natural gas or propane. We can build anything! This pan has a thermo-coupler for safety and air mixer built in to eliminate soot.
Now here is the fire pit with Evergreen, Evergreen Reflective, Blue Green and Blue Green Reflective installed. We also drifted withe the camera and took a few shots of the back yard on the river in her back yard. Enjoy. You can also visit
www.Reba.com for some real cool information and pictures.
The fire pits below are located in Laguna Beach California at the Cliff Restaurant
5775 South Coast Highway Laguna Beach 92651
We used a Clear base with Azurlite on top with Azurlite Reflective. Then we added eEmerald Green Topper and Copper Blue Topper which turns green when it gets hot. Then it turns back. Because the chrome is seen when its cold and the copper changes the color to green when it get 500 degrees.
The fire pit below can be purchased complete or we can manufacture the drop in kit for any table in any size or material/ media. That's what we do, we create and invent for you the customer. We take it one step further for you. We take an idea and create it from your ideas.
Check out the next 23 pictures on this new fire, rock, glass and water feature.


The fire pit below has Azurlite, 1/2" Azurlite, Ice Ice Ice, Starfire and Platinum in the center. Lava rock was used to minimize on the use of glass to keep it in the budget.
The fire pit below is in Malibu California which no one could figure out how to do what we did. The customer didn't want to see the fire pit hood anymore. So we just raised it. And everyone said it couldn't be done! This is what we like to do, take imagination and make it a reality. The base was provided by the customer we just supplied the "raise the hood" and the ring and Bronze and Bronze Reflective glass.
The vent went up 20 feet. E mail us and we will tell you how this was done.
The fire pit and fireplace below are located at the hotel Casa 425 in Claremont California, downtown Claremont.
www.Casa425.com . The fireplace had a splash of Clear base glass over a ribbon burner with a remote control for a simple but elegant look.
The fireplace is just inside the front doors as you enter to greet you.
The fire pit below is also at the hotel Casa 425,
www.Casa425.com and is in the court yard at the hotel. There are 2 of the fire pits and they are 60" x 60" x 20" tall and they are powder coated black with a Clear base glass installed over an 18 round stainless steel ring.
It's like Where's Waldo, can you spot the 2 fire pits below?


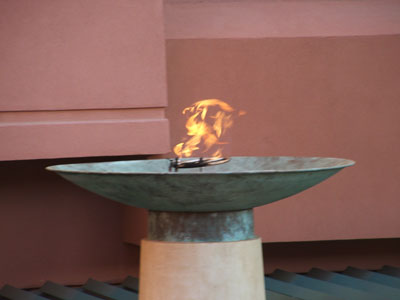
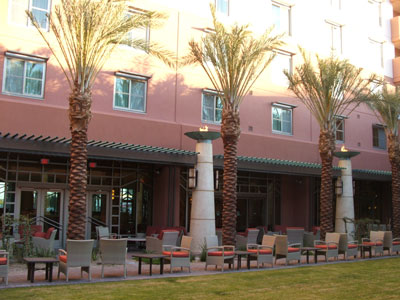
he electronic ignitions that were used in the Renaissance Hotel in Glendale, Arizona were our MVKEI HC-5 units for natural gas. We used flame rod sensors on these torches.
13 of these were installed around the hotel
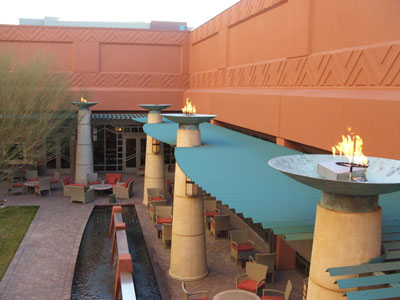
We use 12" stainless steel rings on the torches.

The 5 RV fire pits below are just after fabrication. They are 24" x 24" with a single 18" stainless steel rings installed.
These can be made in any size or shape.
The RV fire pit below is a standard 18 x 18 with a 12" stainless steel ring.
The RV fire pit below was and is used by Rrivre Works in Los Angeles
www.RrivreWorks.com . They are on of the premier event planners in Southern California. Check out their web site.
They used our standard 14" x 14" RV fire pits and built tables around them with a frosted glass table top for the Linda Young Event in Newport Beach California. These can be made for natural gas or propane. The ones used were propane. We will be working with Rrivre on several up coming event and we will be posting a few over the top new products. We are going to be building water and fire features for some of the events. Be sure to check out his web site!
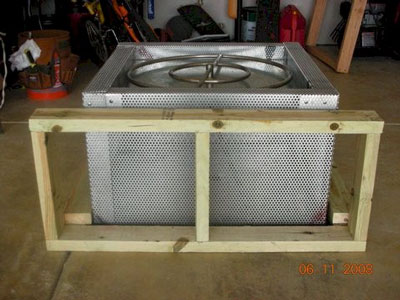
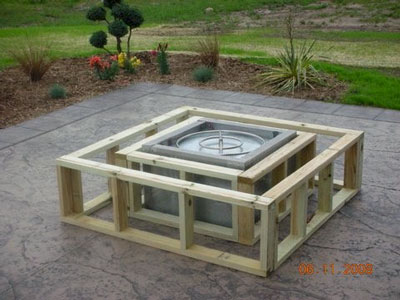
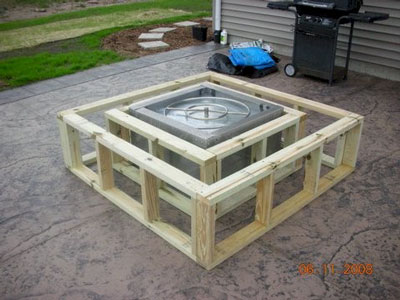
The fire pit below is a custom propane fire pit. We use perforated aluminum for the wall construction and the pit is single wall construction with a 1 1/2" deep pan on top. We installed a 12" double stainless steel ring for the burner. The rest was done by Bill Moss in Texas. Very nice job Bill!. We built the pit to Bills specs which were 26" x 26" x 20" tall so he could finish it to the size he wanted. The pit shown is one of our proto types and not the actual pit used.
Above is how it started
And below is what the customer made it!
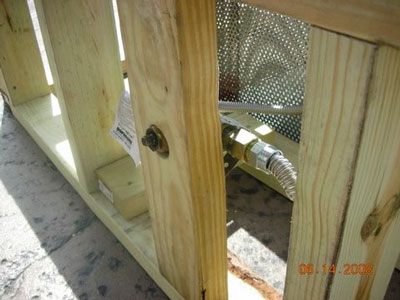
Above and below is the quick disconnect for the propane gas
We use black base glass in the fire pit. It looks light because of the flash from the camera.
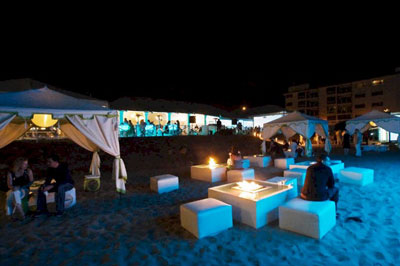
The pictures below are for the opening "90210" Malibu party on the night of the series premier. Click on the link to see the full story and write up from BizBash .
http://www.bizbash.com/losangeles/content/editorial/e12364.php
We use Starfire in our propane RV Fire pits on the Malibu Beach Party.
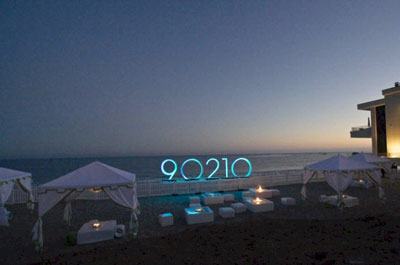
The tables were furnished by www.RriveWorks.com and we furnished the RV Fire Pits.
The next fire pit was designed by and built for Kevin Leys of Chicago. He did a great job and you decide.
First he started with a single wall construction fire box with a pan on the top
Then it was framed for exterior plywood or you could use metal studs and wonder board.
The gas valve was located to the outer framed wall

This is a natural gas fire pit. It was tested as soon as it turned dark, fun!

Now we add the crushed lave rock and glass over that. There are many sub materials you can use as a filler. Just ask.
Great back yord by the way! Chicago, remember?

Now we start to apply the tile for the finishing touch.

The fire pit below is in Glendale, Arizona at the Renaissance Hotel. We installed an electronic ignition with a 30" stainless steel ring. The glass use was a Clear base with Starfire on top and Topped with 42 lbs of Apricot Topper. These pictures were taken with the edges still exposed which were covered by a layer of Starfire.
The fireplace below is in Dallas Texas and was installed by Nadine (one of our dealers) she installed Gold with a stainless steel back
She forgot to take a few pictures with the fire on, oops.
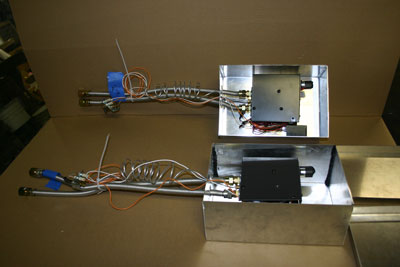
The two boxes below are our IPI battery operated electronic ignitions which are 100,000 btu rated. The exterior boxes are for protection from the weather and keep the unit and batteries safe and dry. These are typically installed under the glass in a fire pit our doors under the glass or in a sub panel just like our 110 volt electronic 415,000 btu units.
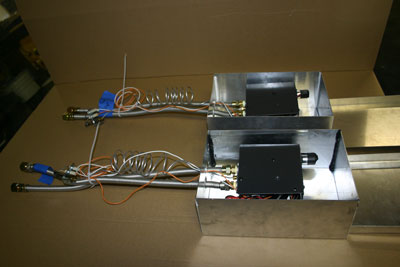
On the left you can see the gas lines, one in and one out along with a 60" IPI lead (Intermittent Pilot Ignition). This allows the ignition system to be 60" away from the flames if required.
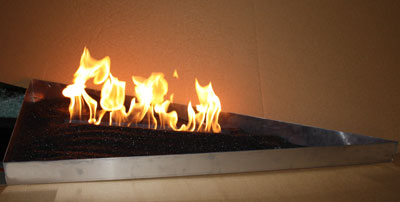
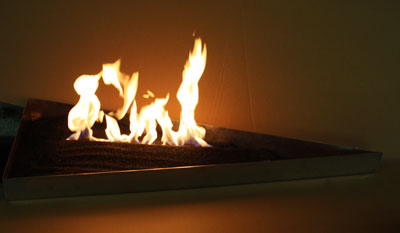
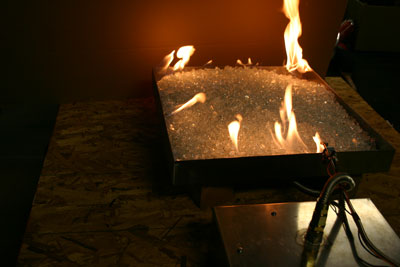
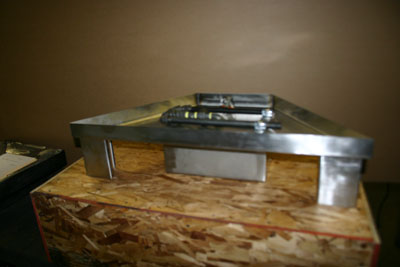
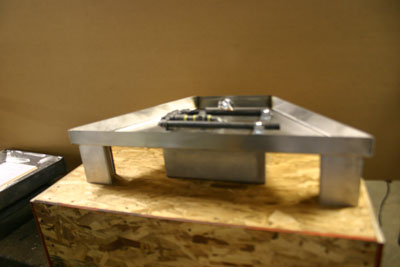
The next several pictures are of a 24" x 54" x 3 1/2" deep triangle pan with our first Ribbon Burner! It lays in a bed of Black Silicone Carbide "Black Magic"
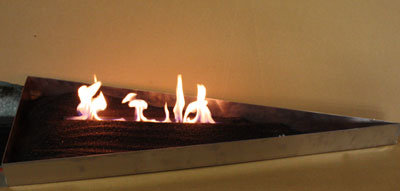
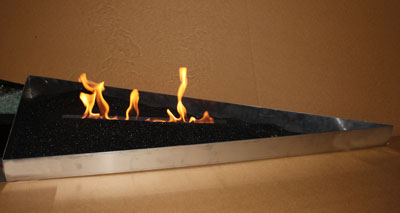
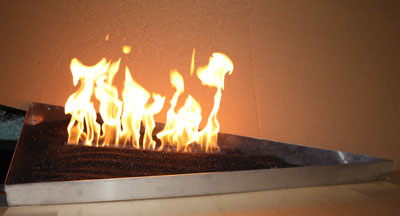
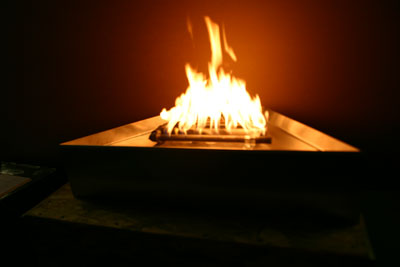
The flames measured 24" tall below! Because of the design we implied to this new burner they seem to be coming from nowhere!
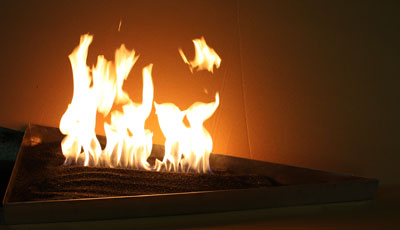
We didn't fill the pan with sand just because. These ribbon burners will be available very soon and we will post dozens more pictures as we have time to post them for you to see. The will be available in steel or stainless steel. With or with out a pan. This burner was built for another customer in Palm Springs for their fireplace and we will post pictures of it as well.
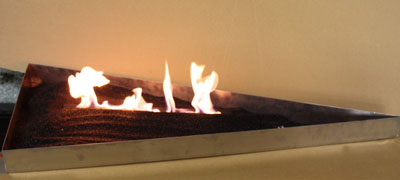
This pan will be installed in a custom table built by the customer in Palm Springs.
The fire pit below has a Ford Blue base with several pounds of Deep Royal Topping giving this pit a very royal look!
The stainless steel pan burner below has a 24" stainless steel star burner installed and it is connected to our 110 volt electronic ignition. This is a propane burner.
We then covered it with our Starfire to test for soot and as you can see, a clean burn.
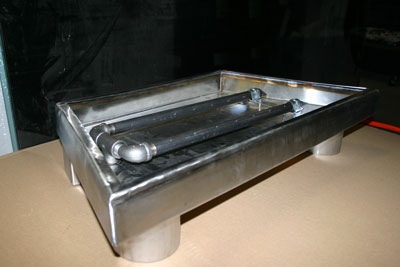
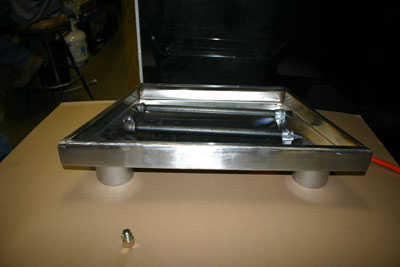
The pan below is a stainless steel pan with a 3/4" lip on top and it sits on 4" round brushed front legs. We will post pictures of the finished pan with glass when we get them.
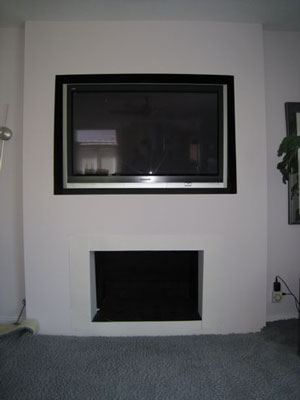
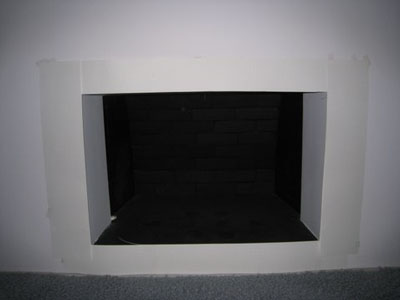
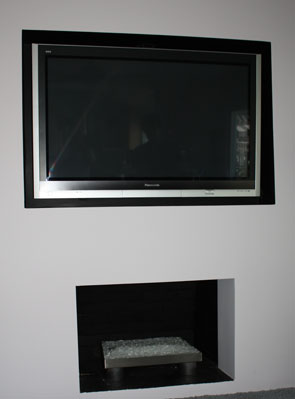
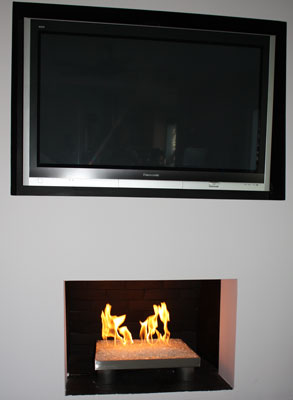
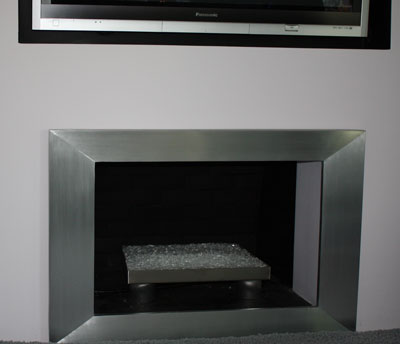
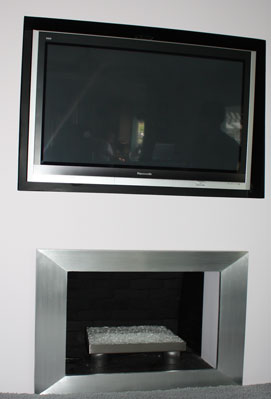
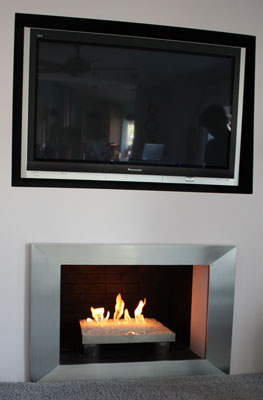
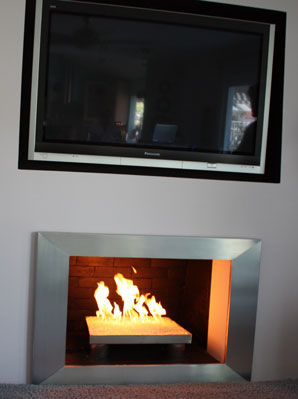
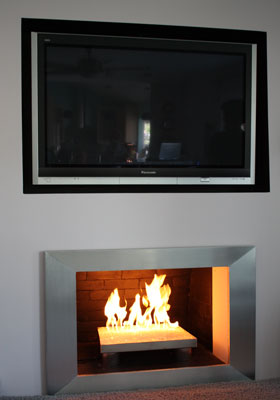
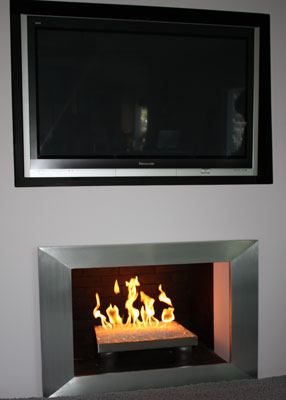
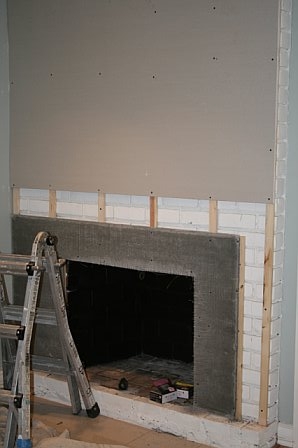
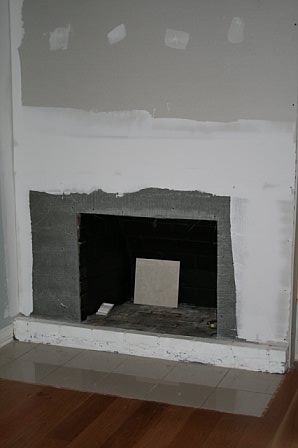
The fireplace below has a stainless steel pan installed with a ribbon burner. The front legs of the pan are 4" round brushed legs with our standard legs in the back. Here you can see the different flame patterns of our ribbon burner. We then installed a brushed aluminum surround.
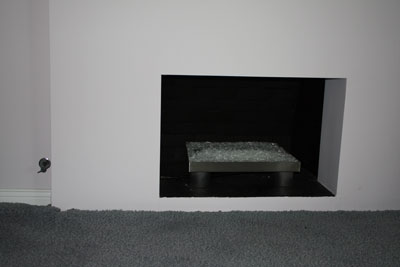
The first 3 pictures are of the fireplace before we started on it. The wall was built out 8" for the flat screen above the fireplace.
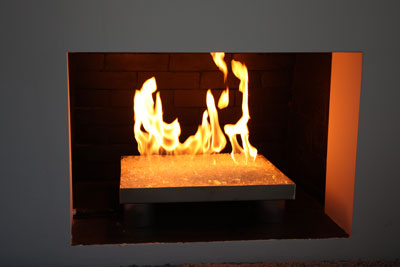
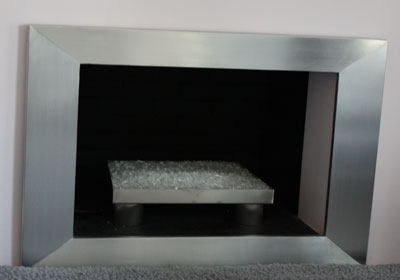
The next 4 pictures are of our ribbon burner after fabrication.
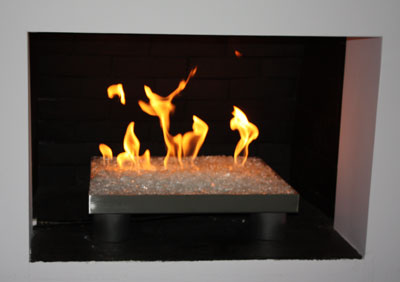
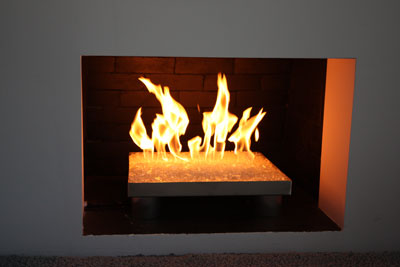
Now we pour on starfire to help conceal the burner.
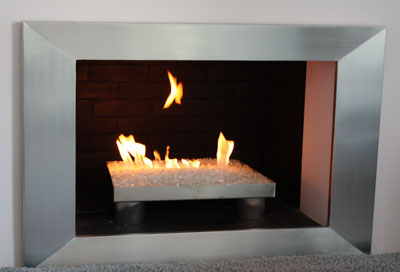
Our ribbon burners can actually raise the flames quite a bit!
This is one of our smaller 18" ribbon burners.
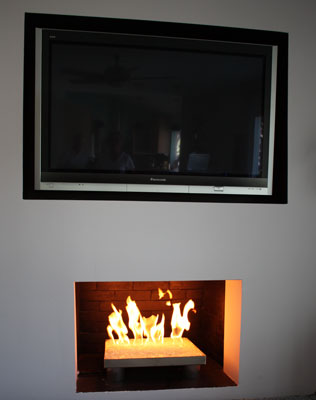
The pan is now installed in the fireplace.
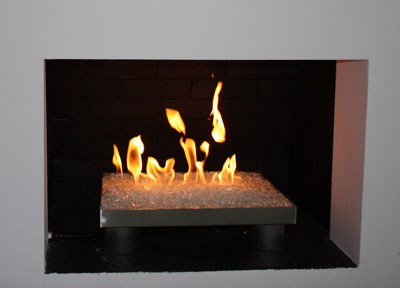
Add a little fire
Now we install the surround to finish this fireplace off!
What we do is very simple, we listen to the customers needs and build from their imagination.
The pan below is a stainless steel pan with a 415,000 btu electronic ignition installed under the pan. It's what the customer wanted. It's like hooking your car up the the shuttle for more power. This pan was installed in Nipomo/ Pismo Beach California, Shea Homes and we get up there we will take finished pictures as we installed 6 other fireplace which we will take pictures of as well.

The front stainless skirt hide the control box which is 4" tall.

24" 1/2 round triple stainless steel pipe 304 stainless steel pipe
The burner below is a propane manual valve with a pilot light. this burner is mounted on a 60" x 30" 1/2 round stainless steel plate which is not included as standard but an option.
The burner itself is a #304 stainless steel 1/2" pipe triple ring burner and can be used for propane or natural gas.
The fireplace below has a Starfire base with Citrine, Dark Red Orange, and Orange Topper with a touch of our Ice Ice Ice. This was a complete remodel in natural gas and a remote control was added with a pilot light
The fire pit below was another failed attempt from a company called Fire By Design in Nevada. They helped these customers design a propane fire pit with an electronic ignition (fair at best) and with the lack of knowledge about propane here is the failed attempt. The ring was to placed above the glass according to the manufacture (wrong!). There was no air mixer/ venturi let alone calibrating for proper air mixture to insure a clean burn. The company would not even return any calls to the customer and we repaired the system and made it work properly. This home was on the beach in South Florida.

Several thing went wrong here, wrong filler (lava was too large), Bad cage design over the pilot light/ ignition, they buried the ignition system under the ring and glass, the ring was left on the surface, no air mixer, no customer support, the ring that was supplied was a steel ring for outdoors, wrong! This should of been a stainless steel ring and a strong recommendation for a cover because it was at the beach! We would of also given the option of a #304 stainless steel marine grade ring. We also manufacture our our rings as well.
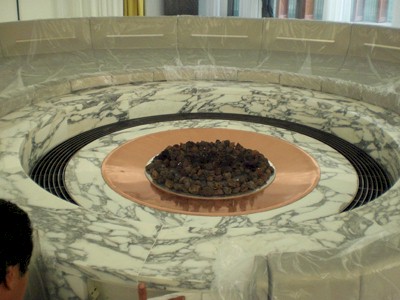
The fire pit below is in the Palace of Qatar and this was commissioned for the King of Qatar. The fire pit is a propane/ butane fueled fire pit and it was installed by Gasco of Qatar. They didn't understand the glass so they opted to use lava rock. Now they (the King) have ordered the glass and if we can get the pictures we will post them.
We did propane for the King and there are no issues! Awesome marble!
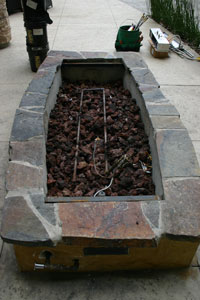
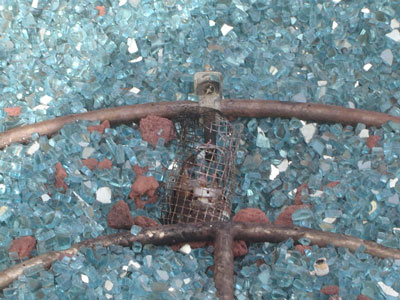
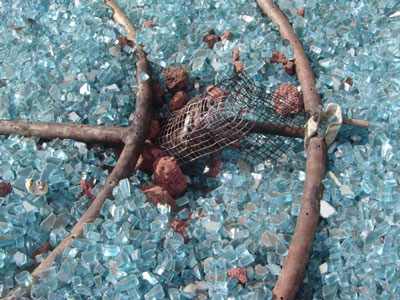
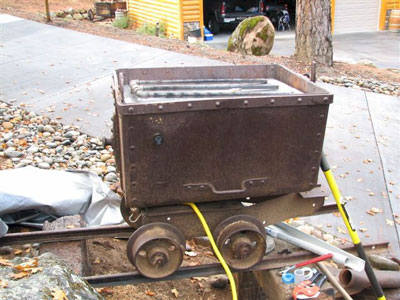
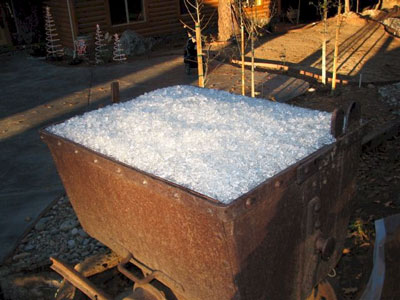
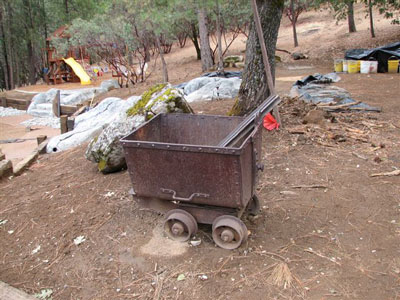
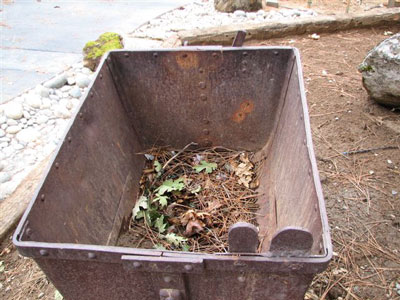
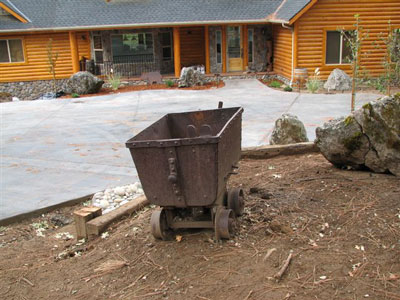
The fire pit below belongs to Mike DeVito in Northern California. When I saw his idea I was excited to help him create something new and wonderful. He took a very old mining cart in his front yard and we helped him convert it to a propane burning fire pit! Turned out pretty cool! Nxt he is getting a fire pit cover made to cover it from debris and who else knows what.
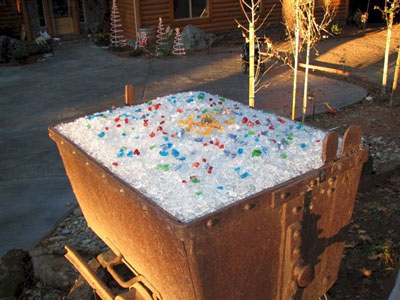
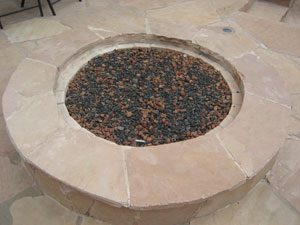
We use a FPPK (fire pit propane kit) with valves, thermo coupler, pilot light and air mixer. The glass that was use is:
Starfire base glass over a bed of crushed lava rock,
Yellow Amber Topper
Steel Blue Topper
Turquoise Blue Topper
Green Tubes
Copper Ruby Red Topper
Ice Ice Ice
and of course our Diamonds in Clear, Pink, Amber and Blue.
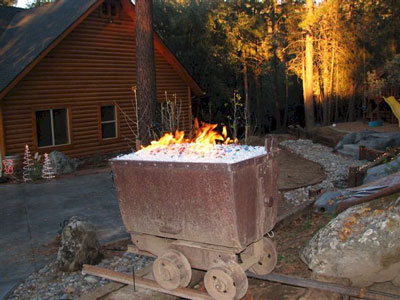
I think this is one really nice idea!
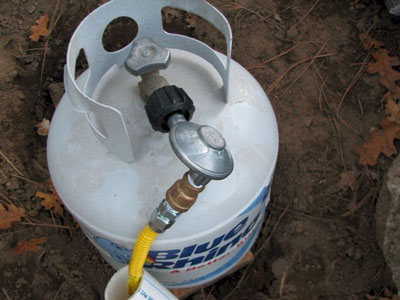
It is all supplied by this 20 lb propane tank
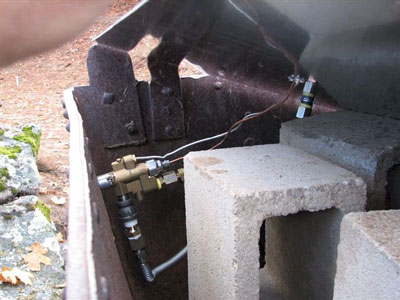
Here is the mining cart with the base plate installed with the burners
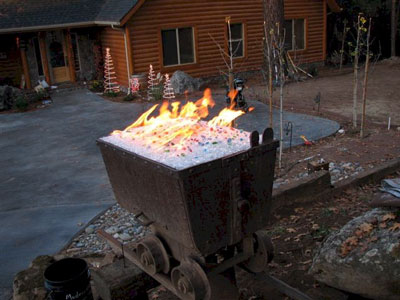
Here you see the controls, air mixer and thermo coupler and pilot light lines under the base plate
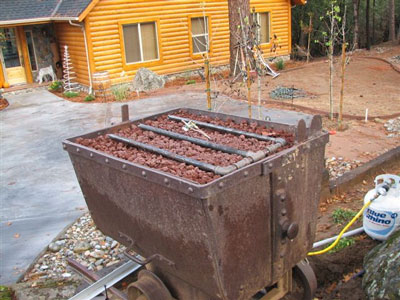
You can use a larger (3/4", 1" lava) as a base under our 1/4" crushed lava as this will save you a few dollars.
Now we pour on the crushed lava to keep the glass from sinking into the larger lava.
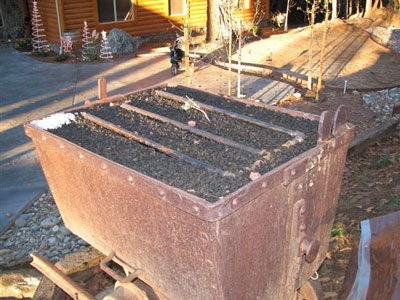
Add some Starfire
Splash a few colors
Have your spouse light it in case something should go wrong! (Just Kidding)
Again here are the first pictures we saw of the mining cart. Great Idea!
Mike, you did a great job!
The fire pit below is filled with lava rock and then was topped with a base of Clear base glass. Then they covered the Clear with Azurlite and topped it with a few Ice Ice Ice cubes. A funny story comes with this fire pit. Elliott came out from the San Fernando Valley as he was sent by his mother, which was tooooo busy to come out herself. She told Elliott to pick out the colors he liked which he did (he was told to pick amber colors). He went home with Amber and gold and set up the fire pit which actually looked very nice. Well to his demise his mother did not like Amber at all! She made Elliott pick out all of the Amber and replace it with what you see here. Yes we did exchange the glass for him to prevent his mother from further punishing Elliott. We will post the Amber pictures when we come across them in our files.
Elliott: It turned out very nice! I hope your Mother is happy now.
The fire pit below has a Azurlite base glass and a black granite ring for one very nice fire pit!
The fire pit below has a Bronze base glass with Bronze Reflective and Scarlett Topper on top.
The fire pit below is one of several Katrina builds in the San Francisco Bay area. She will build anything thing you can imagine in here field of design. Please contact us so we an put you in touch with Katrina.
The fire pit below she used a Clear base glass.
The fire pit below has a Black base with Black Reflective on top.Not too great of a fire pit picture but you get the idea. Even with Black as a base glass you will only see the color of glass under the fire. The flames don't change color nor does the glass, but the glass is what will reflect the light at night.
The fire pit below is in Newport Beach California at Newport Coast Development. We replaced a hot spark ignition which did not work, with our IPI (intermittent Pilot Ignition) electronic ignition system. The fire pit was 18" deep and 48" across. This is what was installed:
1 IPI Electronic Ignition for Natural Gas connected to a 1" gas line
1300 lbs crushed lava
144 lbs Clear base glass for a 2" fill over the crushed lava
36" triple stainless steel burner ring
20 lbs Clear Topper
20 lbs Cobalt Blue Topper
20 lbs Copper Blue Topper
We will show your from beginning to end:
Looked pretty nasty when we got there
We started to pour the crushed lava with our electronic ignition being raised to the surface by the lava rock
We built a double box to protect the equipment in the fire pit as well
The ring is now installed
The electronics
can be accessed if ever there was a failure of the equipment and you can access it from the surface. Before the equipment was 20 inches below the surface, not a very good idea!
Now we poured the 144 lbs of Clear base over the crushed lava
We only did the fire pit, not the view. That came with the home. But one very impressive view!
Then we spread the Clear Topper, Cobalt Blue Topper and Copper Blue Topper over the Clear base
As you have looked at all of our pictures we would like you to know we use Crystals as our Toppers and Toppings. We don't use "Recycled" glass, ever! We are actually the only company that produces Crystals for fireplace and fire pits.
We tried to get pictures of it burning, but the flames just didn't show. Look above and you can see a flicker in the daylight. Actually the flames were over 16" tall but you can't see this in daylight.The contractor will get a few night pictures when they and if they can.
The fire pit below is a custom fire pit in Covina California with one really great back yard design. This back yard was designed for great parties. If you look and see the glass wall with the etching you will also see the fire pit in the back ground. The glass that was used: Gray and Clear Pyrite base glass Gold Reflective Copper Blue Topper This is one really good looking table.


The fire pit below had the wrong type of burner let alone the location of the burner.
The burner must be with in 2" of the ultimate top of the surface of the fire pit. Filling the pit with gas and then trying to light it? Nothing good can become of this. We installed a #304 stainless steel "H" burner, covered it with crushed lava (1/4" / 3/8") over the larger lava rock. This is what keeps it from trickling to the bottom. Them we topped it with Starfire base glass. Then Eric is trying to decide which colors/ topper he should add if any at all.
Wrong type of burner above.
Our "H" burner below. Watch the flame pattern as the crushed lava covers the burners.
Now for the big decision, more colors and which ones?

Las Vegas Yard Crashers!
This will air in April of 2010!
Here is a preview

This is what was done on the first day. I showed up on the beginning of the second and the final day. It's amazing what can take place in just 12 hours!

Above the pavers were installed the day before.
Below is the patio with the outdoor kitchen set aside for now.


Above is where the outdoor kitchen will reside later.
Even the palm trees were brought in! There was nothing on the site when it started the day before.

Below Ahmed was leveling the ground around the fire pit area. Ahmed worked all day, much harder than anyone else! I was very impressed how hard he actually works to get the show done.


Below is where the propane fire pit will sit. The controller will be mounted to the side of the concrete base after the paper tubes are cut away.


Above and below you can see the inside of the planter is coated to prevent water from leaching out.

Above you can see on the ground that we brought the fire bowl in. Just so you know it was about 300 lbs!


Above and below you can see outdoor kitchen. The trough coming out is actually water fall spilling into a dry creek bed below. The water feature was covered with a glass top making it a dining area as well. On the inner wedges they wrapped rope lights to accent the water and rocks under the glass top.


Above and below you can see the sand was installed as a base for the artificial grass to come.


Above they are compacting the sand for the grass to be installed.
Below Ahmed is finishing the dry creek bed.

Below the grass is installed.

Below the dry creek bed is finished and the grass is now installed in the back are as well.


Above is our fire bowl on propane. We used Starfire base glass with Ice and Diamonds on top. We brought out several colors of diamonds for the customer to pick and choose bur she liked them all so much, she installed every last one!

Below you can see after everything was cleaned up how spectacular it turned out!


We are to feature several more episodes with Yard Crashers and we will be showing several more of our new product lines on their shows. We still have several shows we need to post pictures of what we did. Please come back from time to time to see our latest updates.
I thank Ahmed and the producers of the Yard Crashers for giving us the opportunity to work with them.
Thanks to Tiffany, Krystal and Holly at the Idea Factory!
Idea Factory produces Yard Crashers for the DIY Network
"Click HERE for the DIY Network/ Yard Crashers Site!"
The fire pit below was built by Mark Showalter in Washington state.
He used:
Gray and Gray Reflective base glass,
Gray Pyrite,
Copper Ruby Red Topper,
and Black base glass mixed in.
This is the stone pot with the bottom up.


They drilled for the trimming valve to be installed.


A picture is worth a thousand words, and here you have it.

The fire pit below (from Randy Cox) has a Clear base with Pale Cobalt Blue Topper and Aquamarine Topper for a simple but very nice fire pit.

Below you can see the larger 3/4"/ 1" crushed lava rock as a base filler.


Below you can now see our 1/4" crushed lava to finish off the larger lava.


The glass goes in and your finished!.

Randy installed a 22" stainless ring and when he took the picture he had the flame on low.


The fire pit below belongs to Chad Haupert. He used an Azurlite base with Azurlite Reflective on top. Then he created a star in the center using Bronze Rust Copper with and outline of Ice Ice Ice. We didn't get pictures of the complete pit nor of it burning. But it looks great!


The burner below is one of our FPPK's (fire pit propane kit). With this FPPK we set it up for Black Magic! This was table tested for the pictures. Hopefully the customer will send us pictures after and during installation. We first sent these pictures for the customers approval. Here you go! The pan below belongs to Scott Spector and he finally installed the fire pit in his back yard, WOW, one really nice backyard!
This is one of our propane pan burner with slight modifications.
As you can see around the lower edges it was leaking and yes we did fix this.
The fire pit below was built by Scott Spector in Florida. He started with an FPPK 30 which includes a 30" base plate and a double 24" stainless steel ring. Here we go from the beginning:

The propane line was run/ installed under the pavers.


The colors that were used are
1/2" Clear base,
Black Magic in the center,
Clear Diamonds,
Cobalt Blue Topper,
Clear Topper,
Cobalt Blue Light Topper
and our FPPK 30". That is our 30" propane burner. You can see the actual burner above burning before shipment and installation.

We don't have any pictures of the fire pit burning at Scott's but he did tel us that when he fired it up again he would try to send us a few pictures. Thanks Scott.

The fire table below was built by Christina "Stina" in the San Francisco area. With a little ambition, imagination and our help, she now has one very nice fire table.

Here is where it started. She made a template of the pan and where the mounting tabs would be located. Then we built the aluminum pan and propane burner for Stina to install.

Below is how the teak table started. We just brought it into the future.


Below the pan was installed with Galaxy Green base glass.


Below you can see the top installed and what a difference.

Below is her wonderfully finished project, Great job Stina!

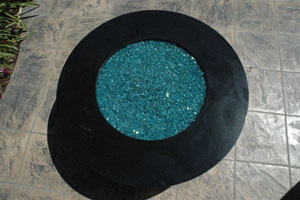
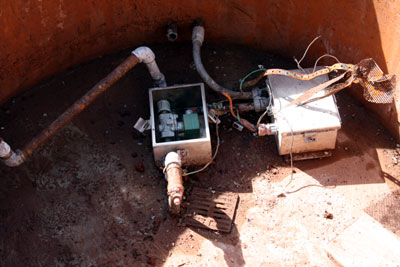
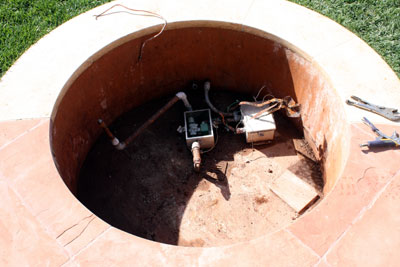
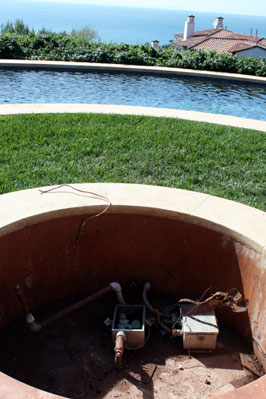
The fire pit below is going to be installed in Sacramento on 11 14 09 for the Yard Crashers/ DIY/ HGTV show. After it is and has been installed we will post pictures on the Yard Crashers page. In the mean time here is the how to and why. We can build any size, shape, design feature you desire. We build to your imagination.
Below is the catch basin to hold the water for the feature

Above you see the auto fill?
Below the water pump is now install below.

Below the top pan is in place for testing with the fire and water bowls in place


Below the stainless steel ring is installed.

Below the glass (Bronze base glass) has been installed and the lights turned on.
 .
.
Below you can see the pump has been turned on.

and now the fire.

We placed a card board template to replicate the table top to conceal the lights as well.

Now we add color to the water!


Here is the feature exposed with the blue water. You can change the water to any color you like.


This feature is only 6 1/2" tall. You can mount this under the table top and keep it only an inch or so above the surface of the table top.

So let's change it to red water and add Starfire base glass.


Remember, we build to your imagination!

The finished pictures will be posted on the Yard Crashers page when this project is installed after 11 14 09!
"CLICK HERE to see the "Yard Crashers" Sacramento show!" See this feature finished here!
The fire pit below is in Palm Springs California. We use Azurlite Fireplace Glass and a crushed lava filler underneath. There were a few issues which we resolved.
First issue: Don't use polished Mexican Pebbles as they will chase you across the yard.
Above, second issue, the ring could of been bigger as we installed a triple 30" stainless steel rind.
Below, third issue the plumber installed a 3/8" reducer, why? :-~ The gas comes is with 1/2", the ring is 1/2" so the plumber installed a 3/8" reducer in between the gas supply and the ring. Why in the heck would he do this? Anyway we just installed a 1/2" flex line and the pressure was back and fine.
Cover the wrong material with at least 1 1/2" to 2" of crushed lava.
And pour the Azurlite Fire Pit Glass
We never were sent pictures of the fire pit burning, but we did test it during our installation.

The fire pit below has V Blue, V Blue Reflective and topped with Cobalt blue Topper


The fire pit below was built to the customers specs. It was 48" round, 10" tall with 8" legs and constructed from 1/4" aluminum. Then powder coated to match the customers request. We will fill in the details as we go.
Above you can see the cross grid to support the false bottom.
Above you can see the false bottom making it possible to fill it with a 2" fill over the ring.
A custom 42" stainless steel burner had to be built.
The center leg was for the gas and electrical for the electronic ignition
Hopefully we will get pictures of the fire pit installed on top of the water fall in New York.
The fire pit below is a mix of V Blue base glass and Azurlite base glass.
The fire pit below is located in San Diego, Gable Point Loma. There were 2 electronic ignitions installed and a false bottom was installed. We filled the base with Clear base glass and 1/2" Clear base glass.The lines were installed from the back.

Below are the electronic ignitions.


Framing/ metal studs were installed and two layers of durock was then installed to support the glass.


Finished!

The fire pit below is from Chad McGraw in Washington State. He took a simple patio and transformed it into a fire pit and seating area. The electronic ignition was installed under the bench to the left and accessible from the rear of the seating area.


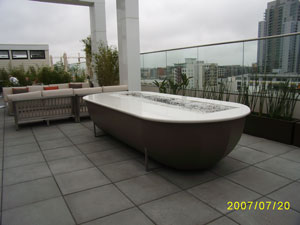
The fire pit below is from Frank Hammond. He created a beach environment in his back yard. He purchased a wood burning fire pit and we converted it to a gas burning pit. We also supplied a quick disconnect gas line to eliminate plumbing underground. he used a Bronze base glass over a bed of crushed lava and topped it with Gold base glass.


The fire pit below is in San Diego California. First we built 2 new half oval stainless
steel rings. To replace a futile attempt of burner rings by the contractor. If you don't want your rings to rust, cover them or purchase stainless steel. We will explain as we move on.
We converted the mishap of rings with two valves, one for each ring. The first issue was the contractor installed a 1/2" gas line, oops. Way too small for the distance. The home owner had to have the pressure turned up by the gas company. Sometimes this is not possible. We spit one line into two. This enabled us to equalize flames in each burner half.
Here are the two half oval rings.
Below are the two key valves.
Cover the rings with the amount of filler (crushed lava) to make the shape you would like the pit to be.
Start to pour your glass. We used Evergreen base glass with Evergreen Reflective base glass.
Here we have it. The customer did get the pressure turned up but we did not get any further pictures.
The fire pit below was installed in Sydney, Australia by Ian Sutherland. He did a great job on his new patio and fire pit. We inspired him to build this really nice back yard project and we were glad to help. The glass that was used was Azurlite and Starfire base glass.

The fire pit pictures below are of a simple overflow water feature with Fire Stones all around.
The fire ring that was used was a 30" round side feed. We make custom rings for any application. Either for propane or natural gas fire pits or fireplaces.
The fire pit pictures below were taken by and for the Sweat Equity weekly HGTV Do It Yourself TV Show. The FireGlass that was installed was:
Starfire base,
Blue Diamonds,
Ford Blue base glass,
with an 18" stainless steel fire pit ring burner with out the center to accommodate the water feature. All of the fire glass was placed around the pile of fire rocks in the center. The top of the table is removable if you ever needed to service the water pump or any other reason. Always build and design it with replacement or repair in mind.
Now for the fire pit pictures:


Aquatic Glassel was used in this and every application.

There was an aluminum sub frame built with durock attached. Then the stone was applied to the surface. All of the components are under the removable top.

This episode will air on or around May of 2010 on HGTV and the DIY Network.


The picture of the fire pit below was taken in Newport Beach California. The glass that was installed was Starfire base glass. One very nice backyard and fire pit!

The next fire pit is from Sandee Visintin and the glass that was used was:
V Blue base glass,
V Blue Reflective,
Aquamarine Blue Topper,
Turquoise Blue Topper,
In a stainless steel octagonal fire pit at the beach.
If you take note a 1/2" piece of glass was placed on top of the fire pit for day time use.
Below is where it all started.
If you look closely you can see the reflection of the glass top cover. Not a bad idea!
Here is what Sandee and Frank had to say:
Hi Ed,
We love our fire pit, and so does everyone else who sees it. Your rock is gorgeous…
We keep a glass octagonal table top on it when not in use; the rock is always visible, even when used as simply a coffee table.
Thanks for your beautiful product and great service!!
Sandee and Frank Visintin

The next fire pit was build/ constructed by Rose Harms in Wyoming. Long story behind this one with what the plumbers were telling her and what actually happened. We will explain as we go.
Above and below you can see we had her install a gas line with a quick disconnect hose.
Here is what Rose had to say:
Hi Ed and Claudia,
Wanted to be sure I got the photos to you of our completed fire pit.
Here are the steps we went through:
Bought the brick/blocks (no lip on the stones) from Lowe's, put in circle, 3 rows high.
Bought the iron fire pit at Lowe's and placed on and inside fire pit. -note -it is iron, so I sprayed it with HIGH HEAT paint, in Copper. Wow!
got plumber to run natural gas from deck above (outlet for BBQ) and under the deck, ran down the deck post and he put in a Shut Off valve there.
It turns.
He ran a precise hole through the bottom off the fire pit to hold pipe for gas to the double ring burner (from Moderustic of course) and it is stainless
steel (no rust). At the bottom of the deck post is a flexible hose which goes over to the fire pit. It CAN be disconnected or even roll up and
shove inside fire pit (after it is cooled).
Note: you do need to chop off a piece of the block, or else just pull one out when you are using the
fire pit. (Kind of like Jenga -just pull out the stone, the others support the fire pit) Unless you can successfully saw off a piece of the stone.
Lit the burner to be sure it works well. It did.
We put in the 1" lava rock in the bottom of copper fire pit and then filled in the spaces with 1/4" lava rock. Should have used More! When we went to
cover the burner we were short on the fireglass. So we ordered more. Still looks beautiful.
Got rest of glass and made circles with the glass and it is beautiful. There are photos of it burning last night!! Lots of warmth on a typical
cool Wyoming evening.
Brick: $200, Fire Pit $79 on sale, double ring SS burner $126, glass -about $250, gas line -don't know yet but guessing $200. Maybe $750-800 total.
And -the way it is made, we could actually dismantle and move it. No mortar in stones. We are very happy with our fire pit and thanks to Ed and the gals
at Moderustic, we were able to make the right choice for glass and burner. Thanks Ed, Rebecca and Claudia. Very knowledgeable and helpful. Could not have managed
this without your guidance. We love being DYI-ers but directions are needed!! We appreciate all your help.
Rose and Doug Harms, Cheyenne Wyoming
Mind that the customers stacked their own bricks!
The glass that was used:
and the rest is history!
This was originally going to be propane but if you have natural gas, then use it if you can. It will cost less in the long run.

The fire pit below was built a
nd designed by Brett Parks in Indiana. Brett came to us to help hm create his water fire feature for his back yard and be able to winterize it during their frigid winters. The glass he used was a:
We then built a custom shape stainless steel burner to fit his idea. We will explain as we go.
Here is his original concept drawing:
Below is his layout with pavers, electrical and gas line coming up.
6" deep water tank.
Stack a few more pavers.
Let's test it!
A custom size and configuration ring was fabricated.
Now your done!
The next several pictures show you a flip top box design for a fire pit control panel. It is constructed from stainless steel or could be made from aluminum. The trimming valves are for adjusting the flame are inside along with an electronic key to activate the electronic ignition. These were made for an apartment complex and only the management had control of the electronic ignition. Here are the pictures.


These two separate boxes were made to fit each specific fire pit.


The fire pit below was designed and built by Tamara Lyons and her wonderful family! Junior help most. The glass that was used is:
Bronze Rust Copper base glass,
E.D. Diamonds, Red and Orange,
Amber Diamonds,
Orange R140 Topper, this particular color is one of our chameleons. It turns a bright cherry red when heated and cools back to orange when cooled!
The fire pit had three sets of burners. One in the center and one on each outer edge. This way you can control how large, how much and where you can have fire when you want it.

This is how it started

Pea gravel base

Measure once, cut twice.

Ohhh, what color?? There are sooo many. What to do????

So we sent a make up of what colors they liked. We can do this for you as well. Just tell us what colors you want and we will mix a batch and send you the pictures!


You should of seen the rest of the back yard! Who needs a house! I would live in the back.

The next fire pit was created by Mike. He used a metal flower pot/ planting tub and just connected it to his gas line. He installed
Clear base glass and Gold on top.
You can see the logs just outside of the pan on the left, yuk! I personally would of installed a ring burner, but that is just me!
But you have to admit, it is a good idea!

This next fire pit was designed and built by Phil. He installed :


The next 27 pictures are of the Dominic Fire Water Feature finished and ready for crating/ shipping.
Here we go: The pictures explain themselves.


Metal Logos! We can create any logo in any size or design! Place your colors in our awesome frames and your set! You can use any of our Toppings to accent the interior or exterior of your Logo or Name! Put this in your fireplace or fire pit with FireGlass in any color!
The first one of many we have created we will soon enough have pictures following with it installed burning.
Here is the first one:

The customer chose one of our Lipstick Reds for a center accent.

The overall size of this "KU" was 6" wide x 9" tall.

Below we used a Cobalt Blue Topping with a Starfire base glass all around.


Texas Long Horn Fire Pit LOGO!
Ed, Rebecca, Morgan and crew at Moderustic:
Finally completed my project for the Texas Longhorn Alum in my RV Park. Actual time was only approx 80 hours but did not work on it full time.
Had my local welding fabricator build the base out of ¼” square tube for the circles and 1” square tube for the legs and attached some decorative feet on it. Also attached some L brackets at the top to install the granite top with.
Fabricator also built a 28” diameter by 4” deep pan out of 16ga steel. Later we decided to add a ¾” lip around the top edge.
We drilled holes in it to install some retractable handles for easier installation / maintenance. Drilled holes for the pilot assemble to pass through the pan and for the burner assembly to attach.
We had another 28.5” diameter 16ga steel circle cut out to create a lid for the pan to prevent rain/debris from disturbing the Glassel bed.
Used the longhorn cookie cutter cut out to make a 16ga steel flat longhorn cutout to affix atop of the lid
Had the pan and lid sandblasted and powder coated black to match the base. Had the longhorn powder coated candy copper along with a handle to match.
Cutout a ¾” plywood base to use to attach the granite to. Installed Tee Nuts into the plywood so that we could screw the plywood base onto the base of the table later.
Purchased and installed some 110v LED low profile puck lights and affixed to the underside of the plywood to create indirect lighting of the table, routed channels for the cabling to follow and used silicone to keep in place
Had my local granite company cut a ¾” thick 52” diameter circle with a 28” opening in the center to accommodate the pan.
Attached the granite to the plywood base using silicone.
Installed Cement Board onto the inside of the table base as a bed for the stone tiles.
Installed the Lowes Special Order Solistone 12” x 12” Stone Tiles around the table.
Created a bracket inside the table base to hang the AFVK-SP-MH/L and extended the wiring on the battery box to allow for installation underneath the granite top outside the table base to be able to change batteries later.
All the parts are complete so time for the final install
1. Place base in location, propane line already in place as well as 110v electric with X10 remote socket for LED lights.
2. Install plywood / granite / LED lights onto table base and screw into Tee Nuts
3. Install Pan on top of granite leaving access into the table to complete connections.
a. Disconnect Pilot assembly from AF-4000 MOD and run gas line, ignitor and sensor through hole in pan inside the table
b. Reconnect Pilot assembly back to AF-4000 MOD ( Be sure to use the correct connections or things will not work J )
c. Attach the battery pack to the underside of the granite base in the routed channel to allow the wiring to move in / out for ease of use.
d. Attach the pilot tube to the AFVK-SP-MH/L module.
e. Install the burner inside the pan and attach the Gas Outlet connection to the burner.
f. Attach the Gas Inlet connection to the gas supply line which has a cutoff on it.
g. Test the remote lighting and check all fittings with soapy water for leaks.
4. Once everything checked out, install the pan inside the opening.
5. Install a layer of lava rock under the double burner to lift if from the bottom about 1”
6. Install ¼” Starfire Glassel on top of lava and covering the burner while leaving the pilot assembly exposed to be able to function.
7. Tested the remote again to verify operation
8. Install the Longhorn cookie cutter and fill with Pimento Red Glassel.
9. Install cover
Bruce Figura bfigura@swbell.net
and now for the construction and pictures...


The next fire pits were designed and built for the Marriott (Islandia previously) in Mission Bay California.
We started with several cardboard mock up tables for the hotel to approve.
We will explain as we move forward.
The hotel decided on the granite and we cut the granite with water jet and polished the edges.
These were installed on the private patios of the hotel suites.
Valves and location are important as well.
They ended up using a thermo couple and pilot light system with a battery operated igniter.
______________________________________________________________________________________________
We will show you how it came to life, CLICK on the picture below or HERE.

_____________________________________________________________________
CLICK HERE or on the PICTURES below to see how this became what it is today!


_____________________________________________________________________
_______________________________________________________________________________
Click HERE to see how it was made, allong with Videos or on the pictures below:


_____________________________________________________________________________